SvelteKit Online Store
Video Link: https://youtu.be/roPUj0l-Y-U
GitHub Repository: https://github.com/Ashot72/SvelteKit-Online-Store
SvelteKit is a powerful web development framework built on Svelte and Vite, designed for speed and simplicity.
Svelte allows us to create lightweight, modern web applications with highly optimized JavaScript. It is not a framework; it is a compiler. Svelte takes your code as input and uses it to generate
vanilla JavaScript by compiling it during the build process into a single vanilla JavaScript bundle. This eliminates the need for a library like most other front-end frameworks.
This means we are shipping the smallest amount of code possible code that is not only small in size but also super-efficient. This makes Svelte faster than most other front-end frameworks.
Svelte also enables us to achieve true reactivity in our apps. Most other JavaScript frameworks rely on APIs to detect when data changes to update the virtual DOM, meaning their reactivity is tied to it.
However, Svelte does not use a virtual DOM. Instead, it writes code that updates the DOM whenever the state in the app changes, allowing us to achieve true reactivity.
Svelte itself is just the UI layer. It allows us to write code that is compiled into browser-readable JavaScript. What it does not do are things like routing, for which we would need to use a
third-party router. It also does not support server-side rendering (SSR). All of our Svelte code is only available on the client, which is not necessarily ideal for SEO. This is where SvelteKit
comes in handy. It provides us with a built-in router, server-side rendering, code splitting, and many other features that not only improve performance but also enhance the developer experience.
Understanding how data flows through your app in SvelteKit can be confusing because of the integration between the frontend and backend in the app.
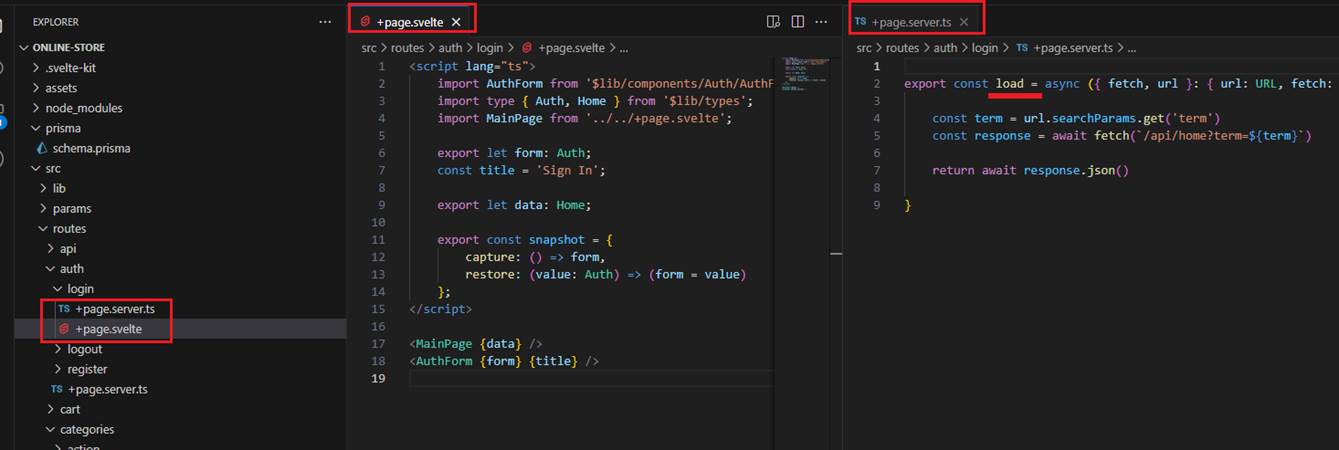
Figure 1
A page is just a Svelte component. The load function inside +page.ts runs on the server and the client but if you need to use a secret, talk to a database, or write to a file
Add .server, so the load function only tuns n the sever. In our app we do not use +page.svelte but +page.server.svelte files.
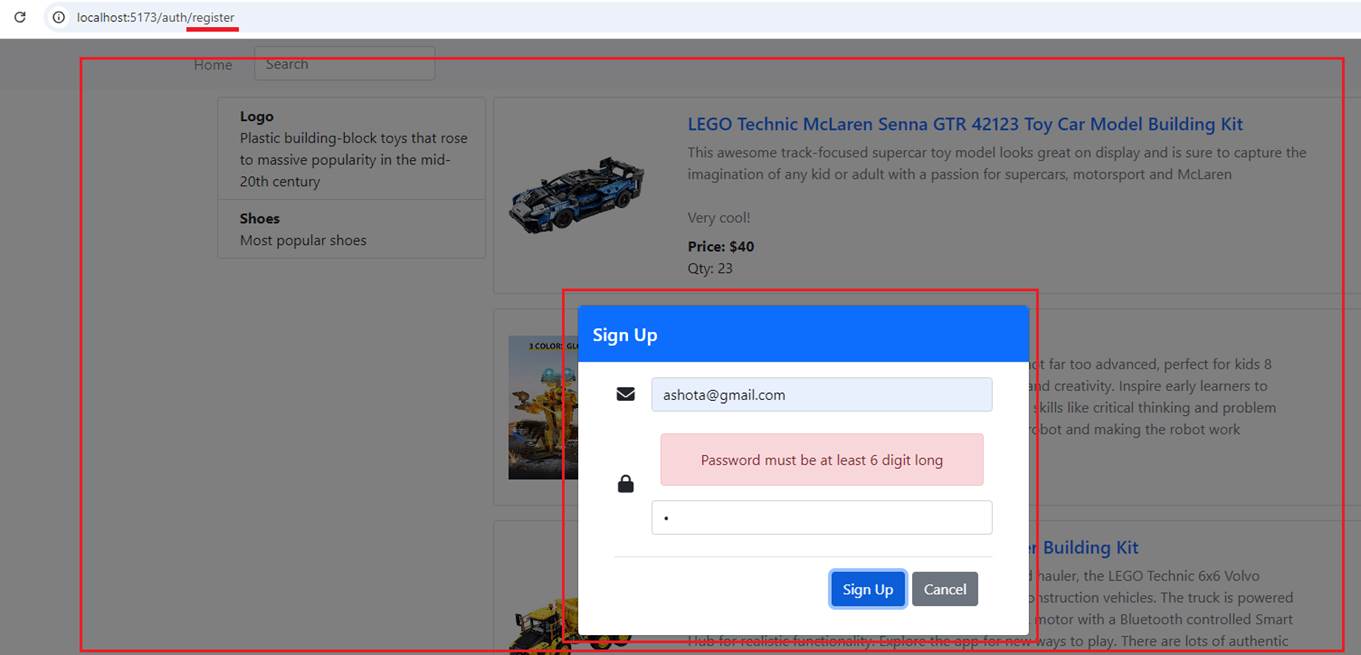
Figure 2
When we navigate to the register route, we see both the online store in the background and the modal form.
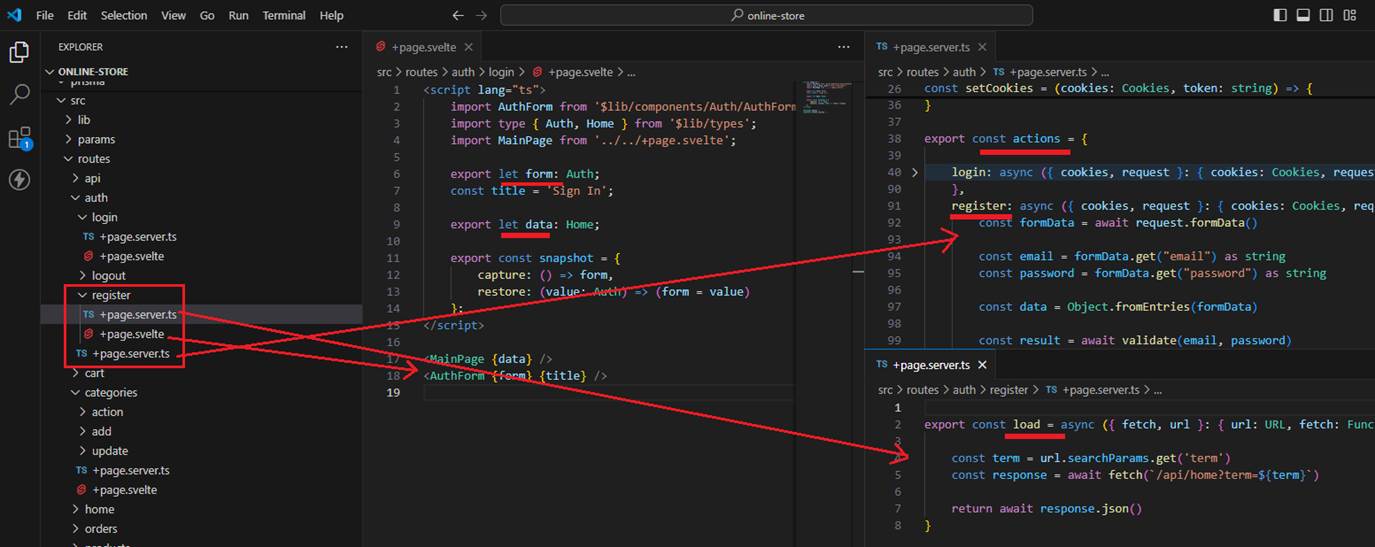
Figure 3
In the +page.server.ts file under the register route, we load the page data through the load function by exporting export let data in the +page.svelte file. The form data is obtained
using form actions in the outer +page.server.ts file and by exporting export let form in the same +page.svelte file.
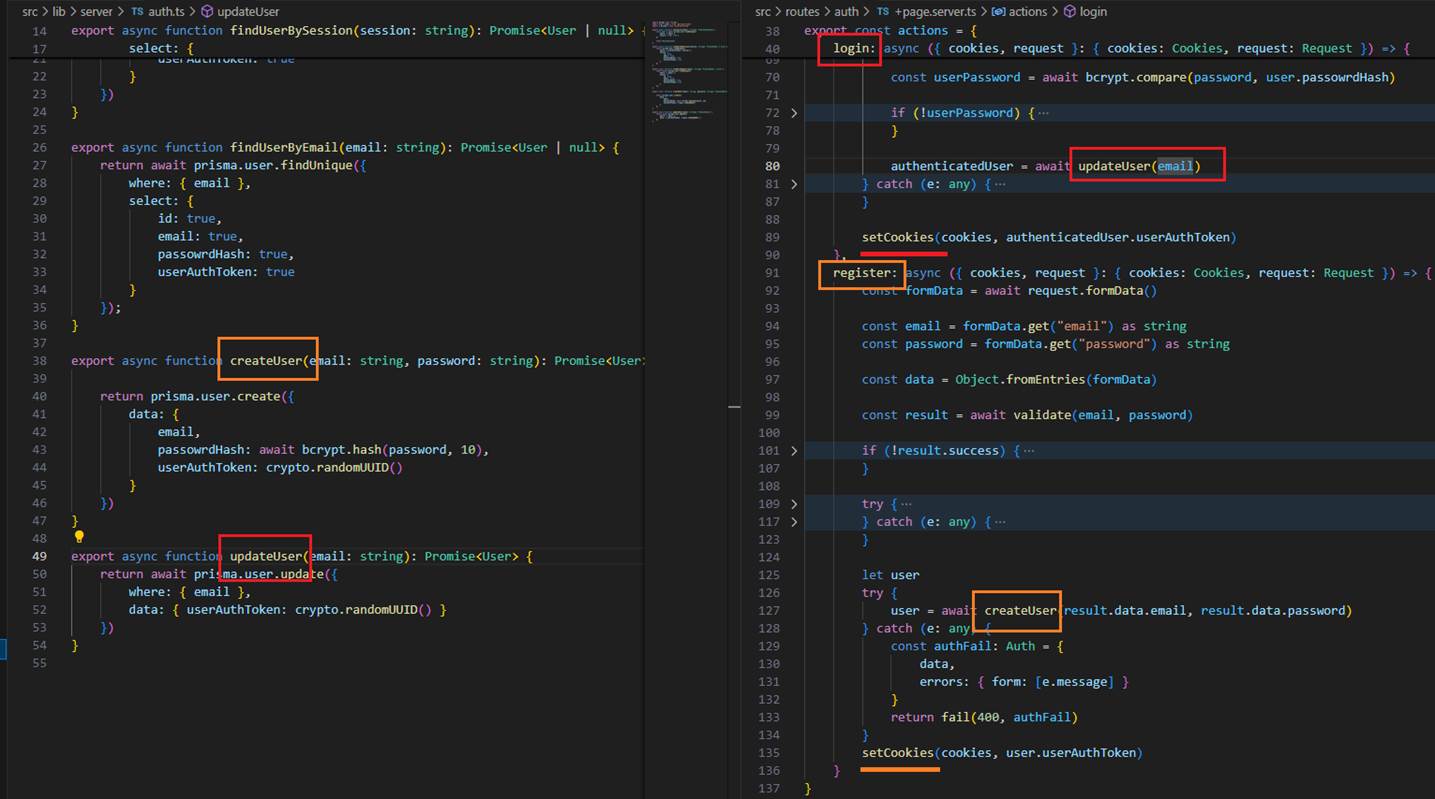
Figure 4
When we register a user or log in, we call the createUser and updateUser database functions respectively to add or update the user auth token, which we will use to access the protected routes.
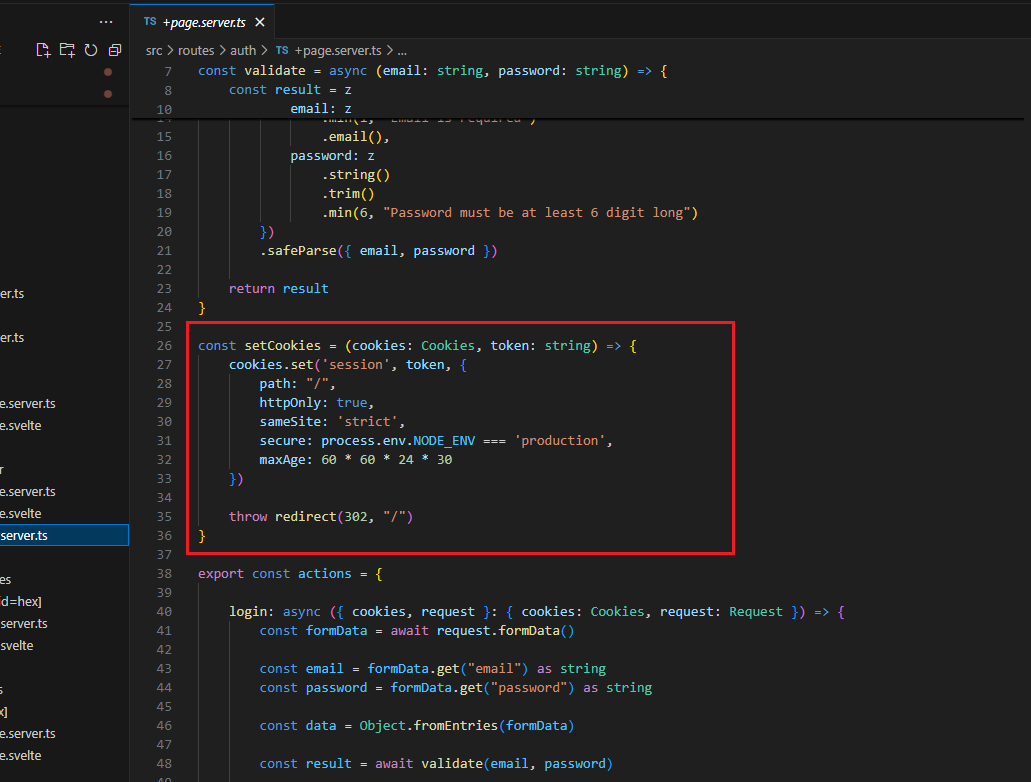
Figure 4a
Setting the cookie.
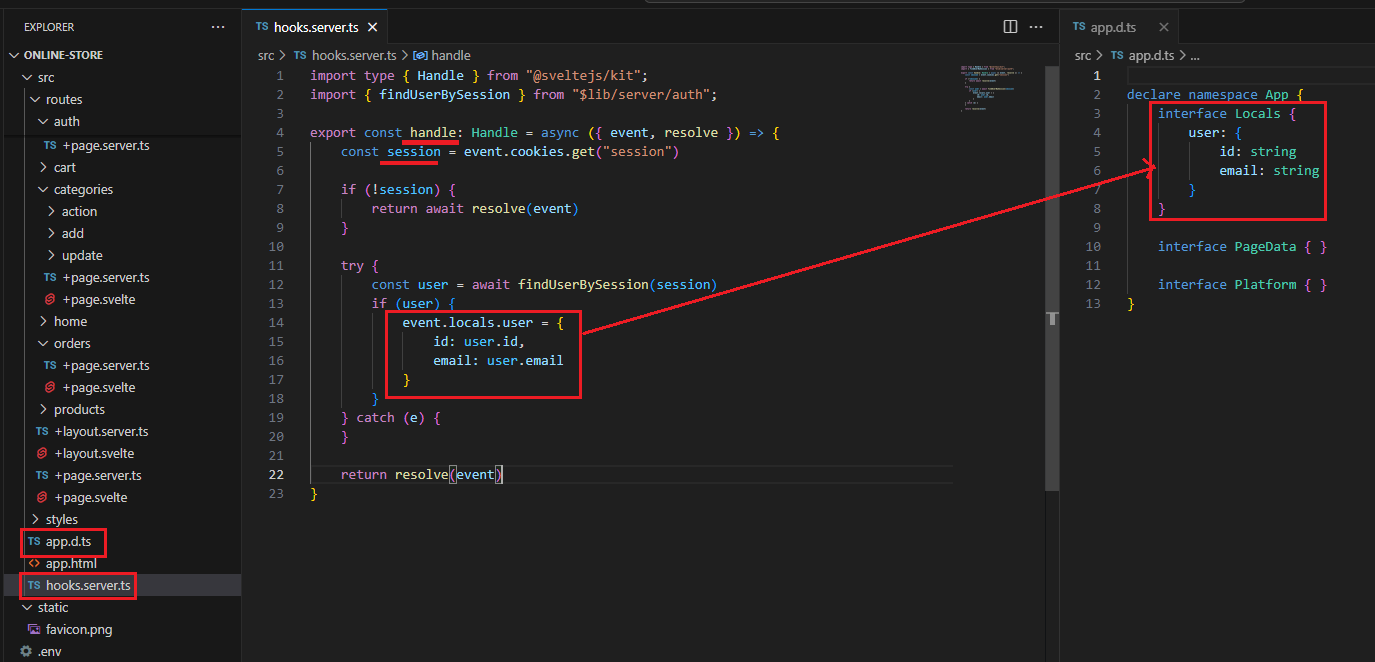
Figure 5
We created hooks.server.ts at the root of the project. In SvelteKit a hook is just a file that runs every time the SvelteKit server receives a request and lets you modify incoming
requests and change the response. After the user is authenticated and cookie is created we can populate event.locals.user with the user id and email.
SvelteKit locals are a way to store data that is specific to the current request.
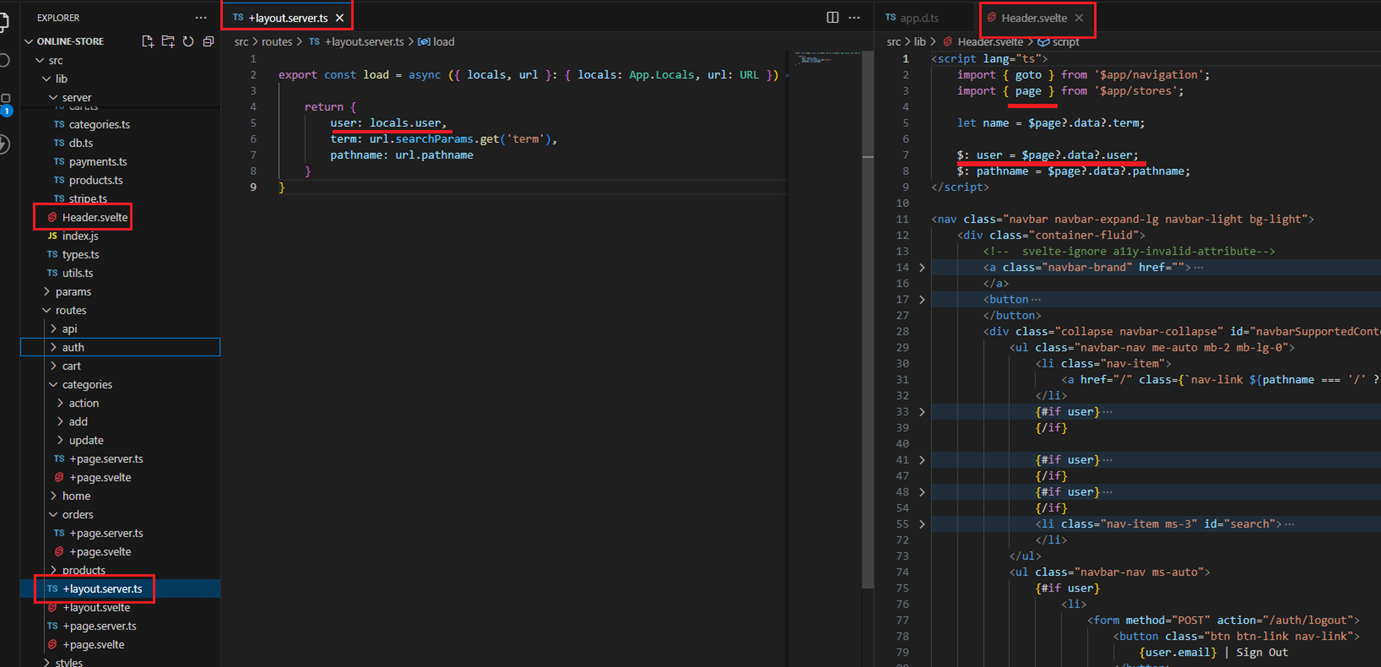
Figure 6
In the +layout.server.ts file we retrieve the authenticated user information via locals.user. Since the locals.user is populated we can pass it to the $page store from +layout.server.ts.
We use the $page store on the client in the Header.svelte file to know if the user is authenticated or not.
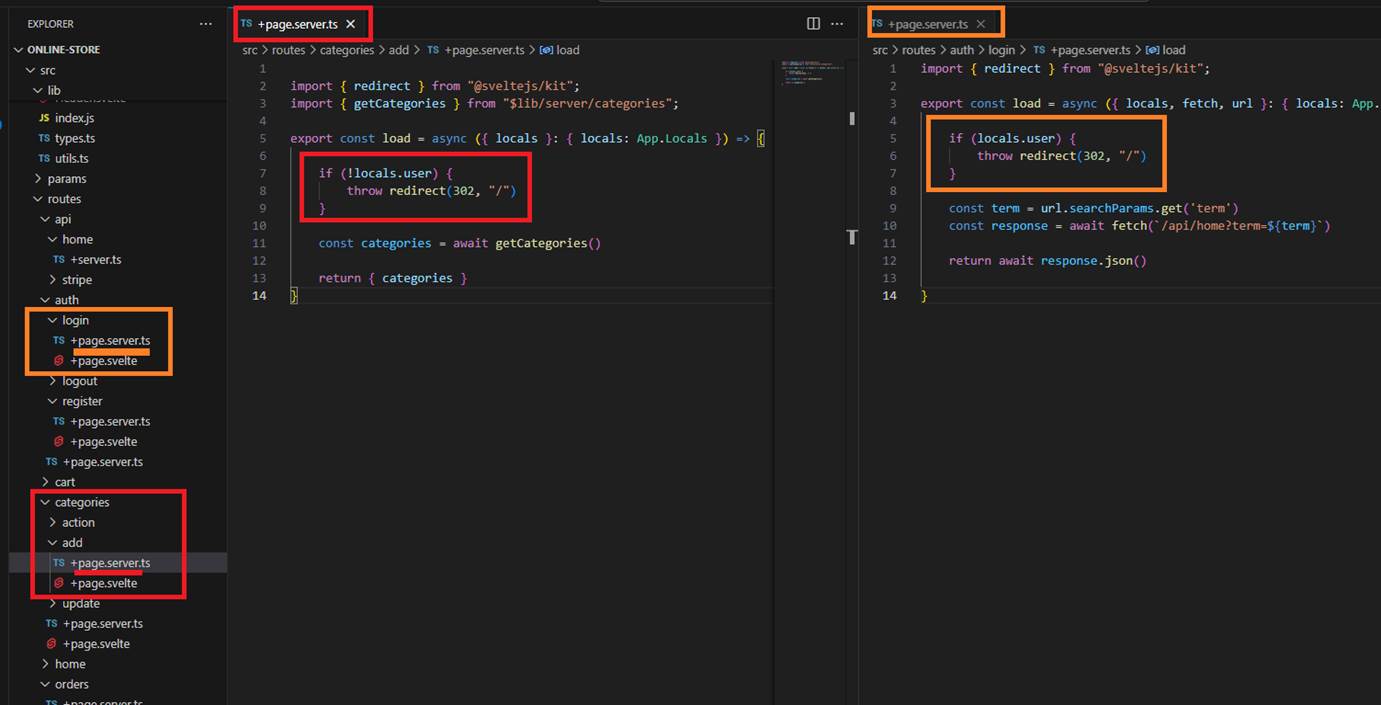
Figure 7
When a user who is not authenticated tries to navigate to the protected route /categories, they will be redirected to the main page. Similarly, if an authenticated user tries to navigate to the
login route /auth/login, they will also be redirected to the main page.
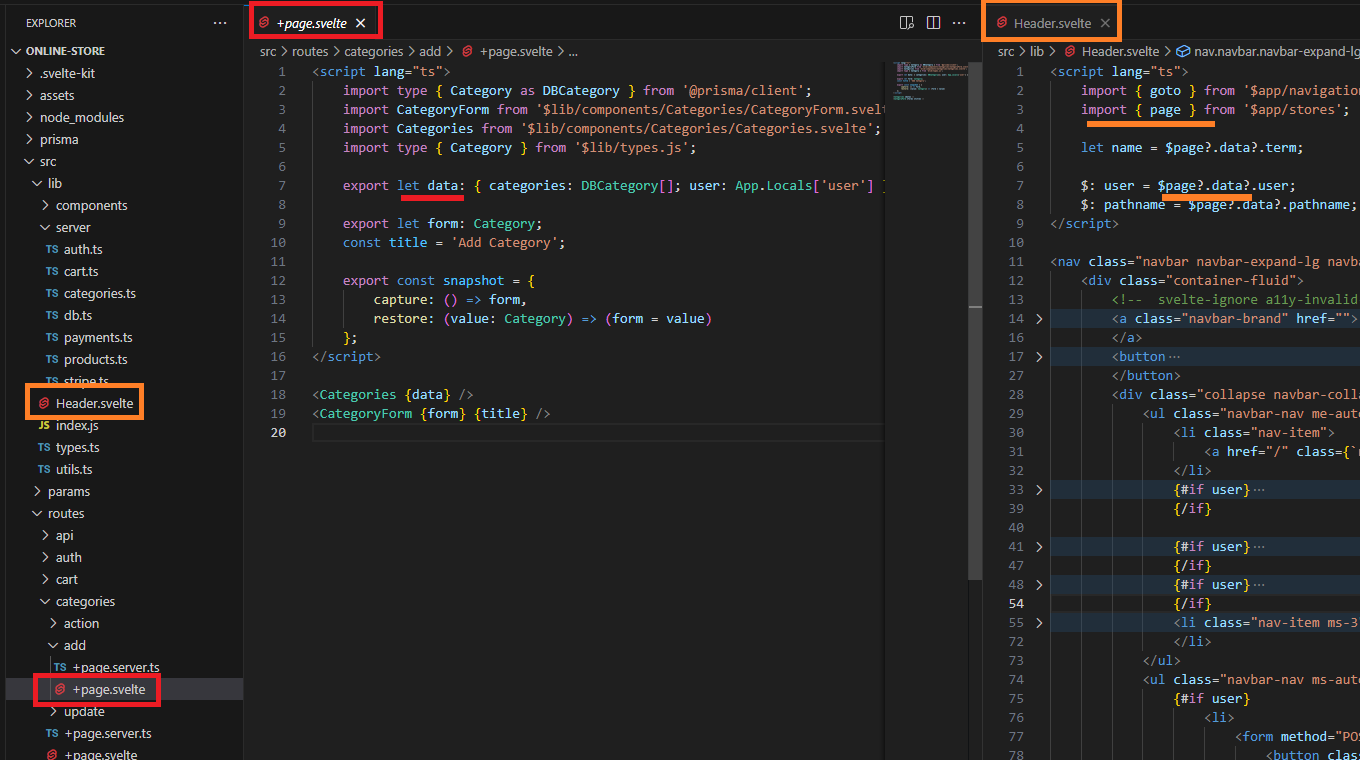
Figure 8
In SvelteKit we can receive data either using data prop or $page.data. In my opinion for a page export let data is convenient and $page.data is useful for svelte components
that are not pages.
Figure 9
In Svelte, $: denotes a reactive declaration. Just like components get re-rendered whenever an update occurs, the same applies to reactive declarations. When a user
is authenticated, we can show or hide navbar items based on it.
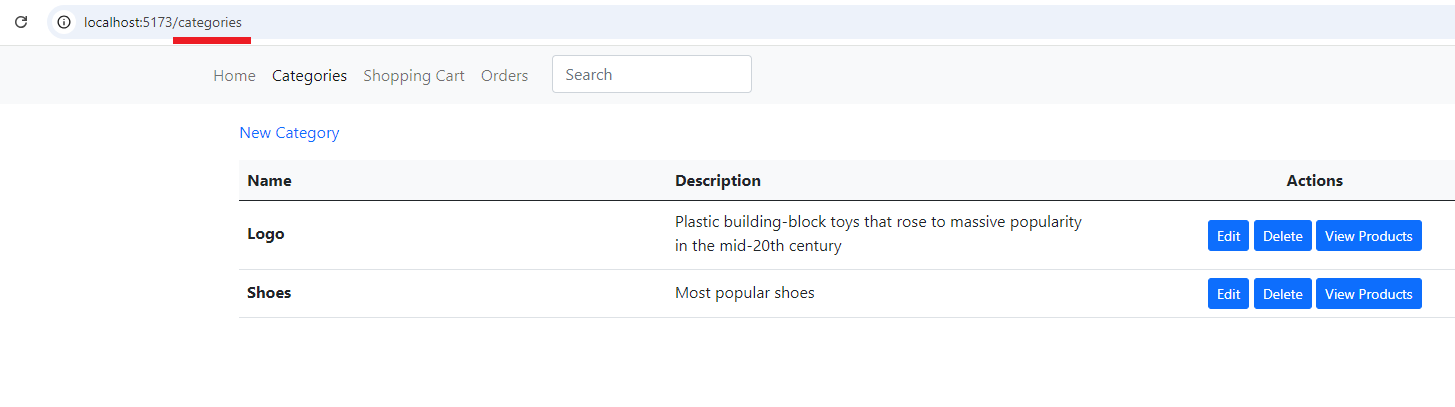
Figure 10
When we navigate to /categories, data is retrieved in the load function from the database to render the page.
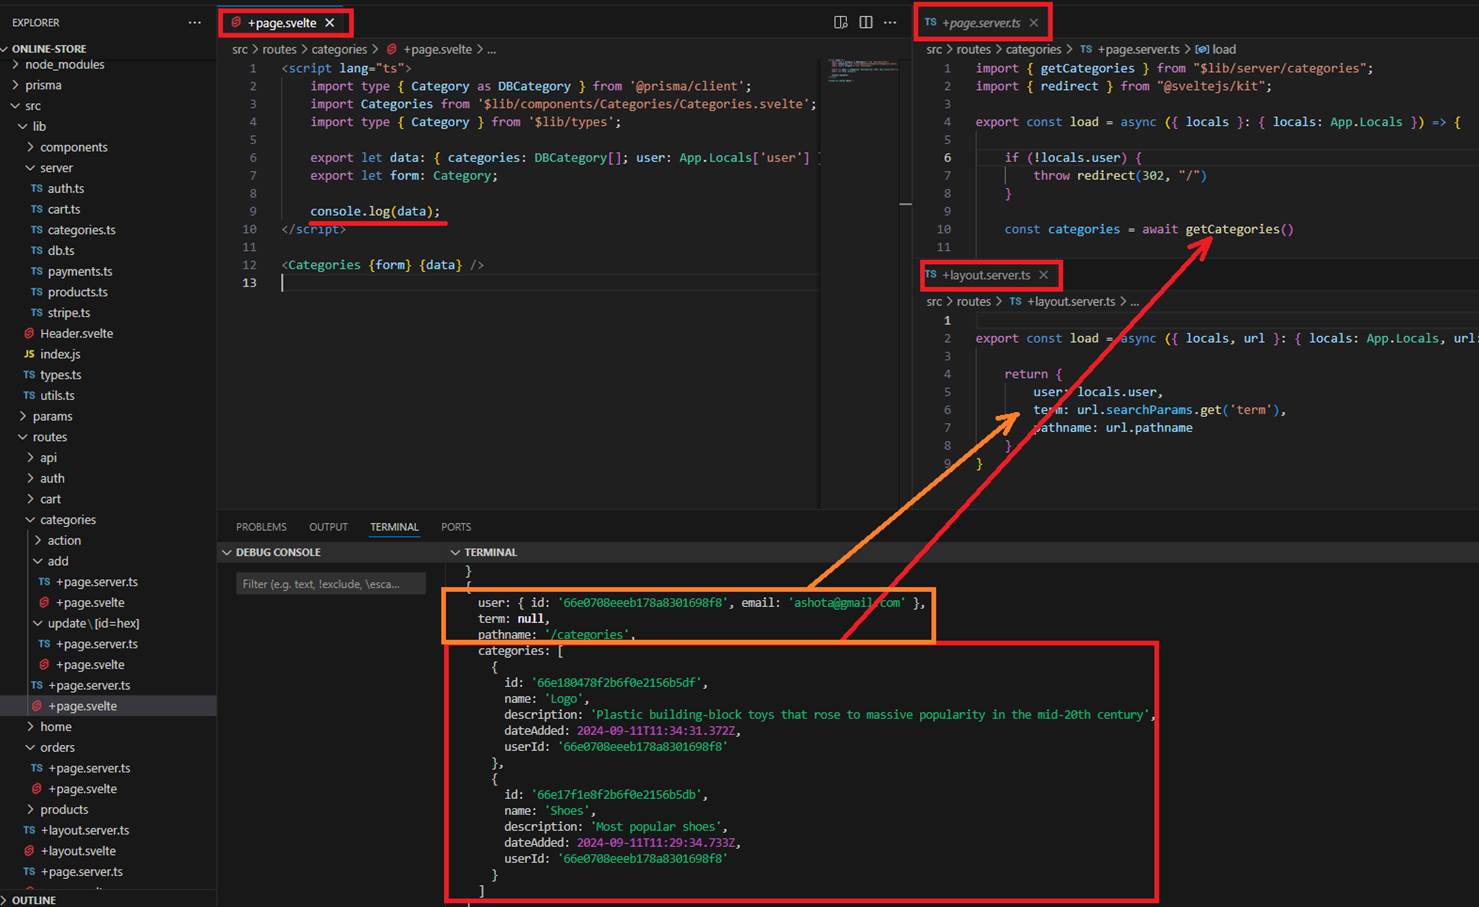
Figure 11
When we console.log the data returned from the +page.svelte load function for the /categories route, we will notice that not only is the data from this function returned, but also the data
from the layout's load function. Data returned from layout load function is available to child +layout.svelte components (we do not have in this project) and the +page.svelte component
as well as the layout that is belongs to.
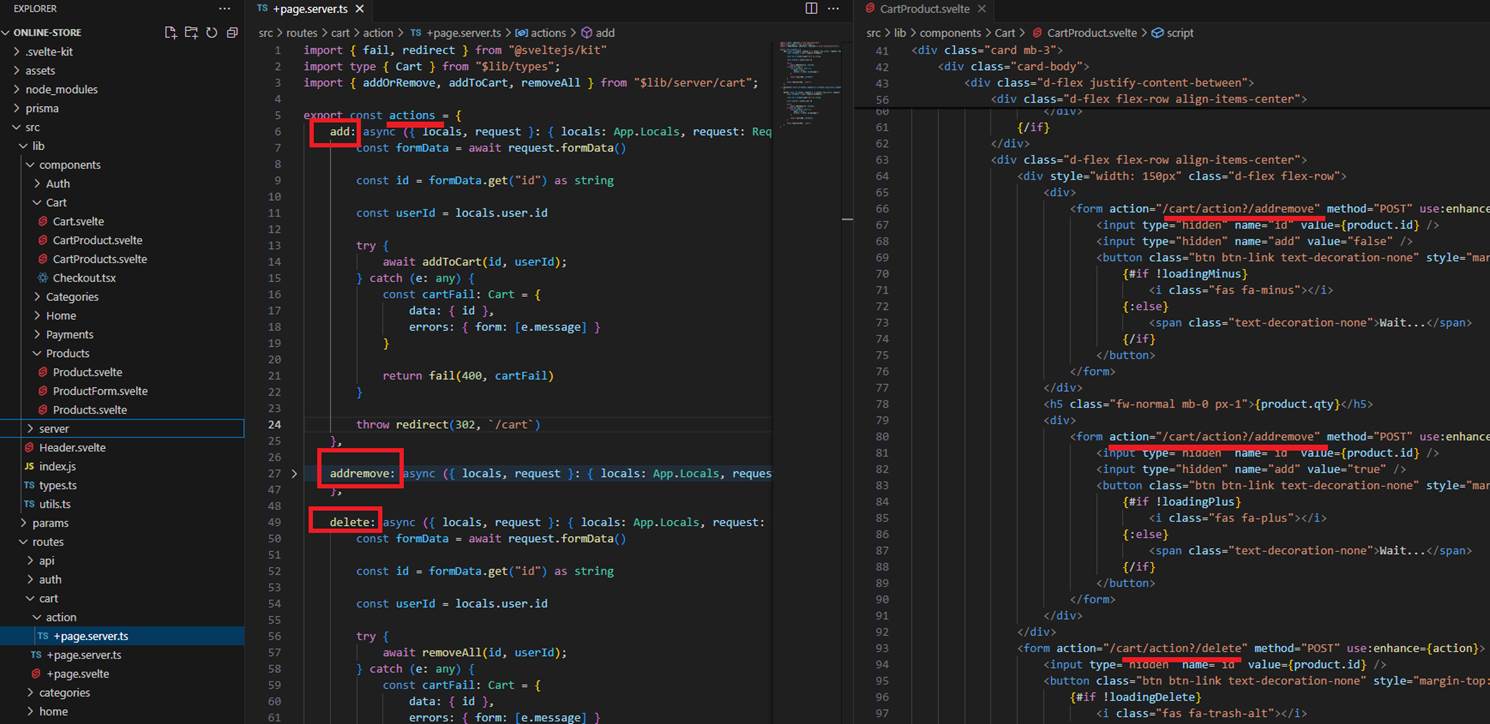
Figure 12
Form actions can define methods that map to an actions inside a +page.server.ts file. If you do not define an action attribute you can use the default method but for multiple actions
it is replaced by named actions like action=”?/delete”
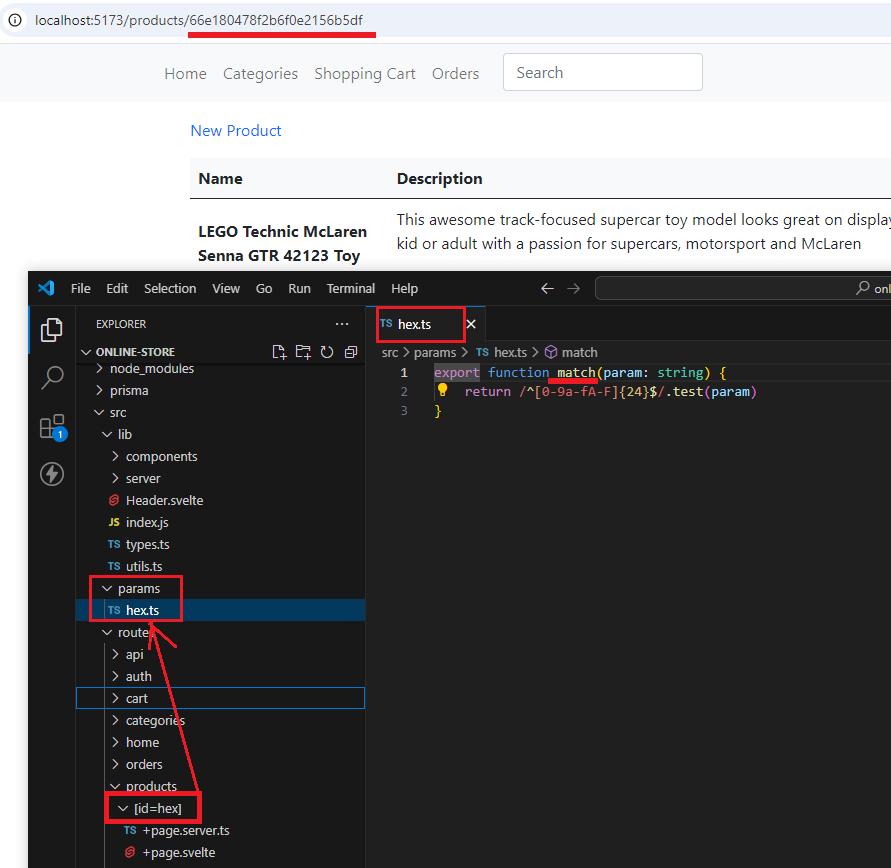
Figure 13
It is possible to perform pattern matching in SvelteKit routes. First, we create a params folder under src, then define the match function in a file within the params folder.
The route references it using the [=hex] syntax, in our case.
Figure 14
If it is not a valid MongoDB ObjectId(), then it will not match the route.
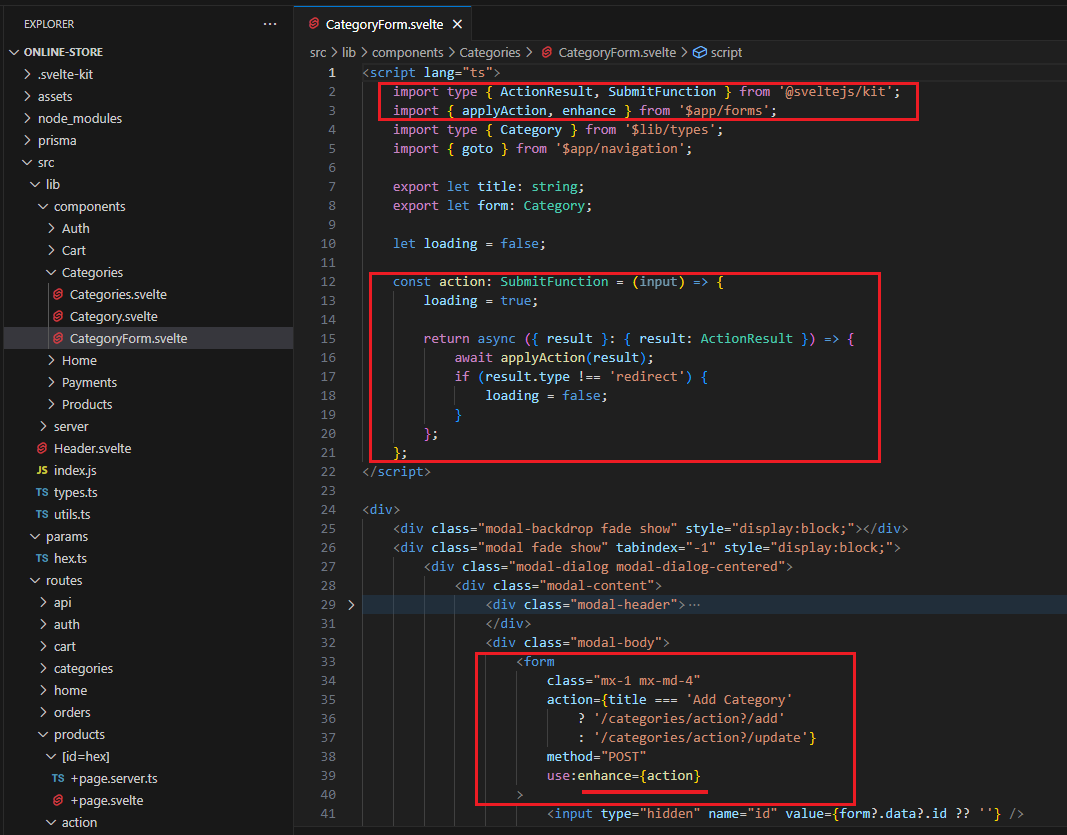
Figure 15
Each time you submit a form, the page reloads, which is the default behavior. This means the form works without JavaScript. Without any arguments,
use:enhance emulates the browser-native behavior, but without the full-page reloads. We customized the enhance action to display a loading UI by
providing a submit function that runs before the form is submitted and can return a call back that has access to the result.
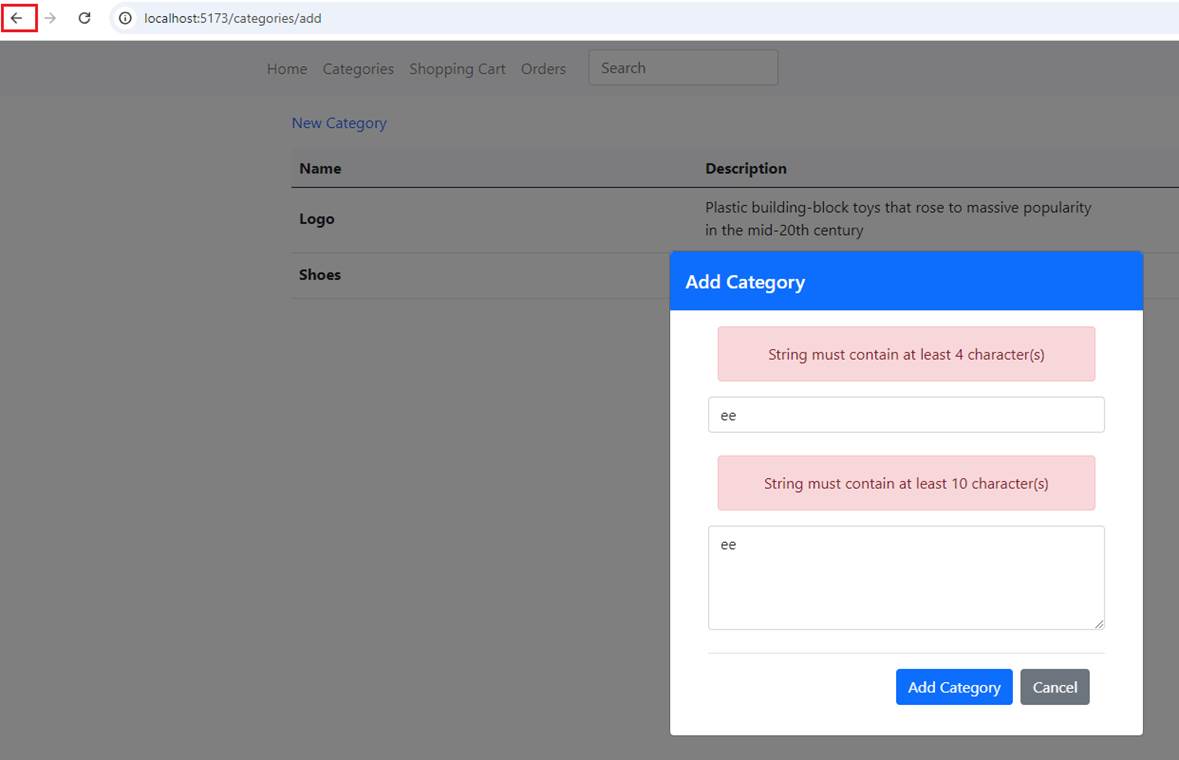
Figure 16
Let's add a category that is not valid, for example, then click the back button of the browser.
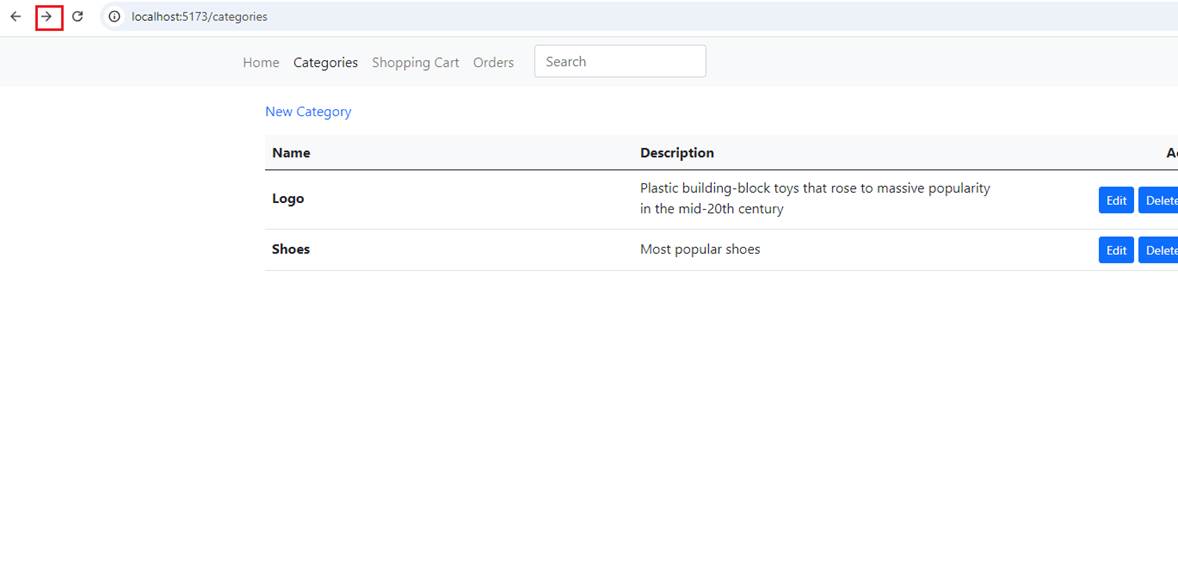
Figure 17
You will be redirected to the categories page. Now, let's click on the forward button.
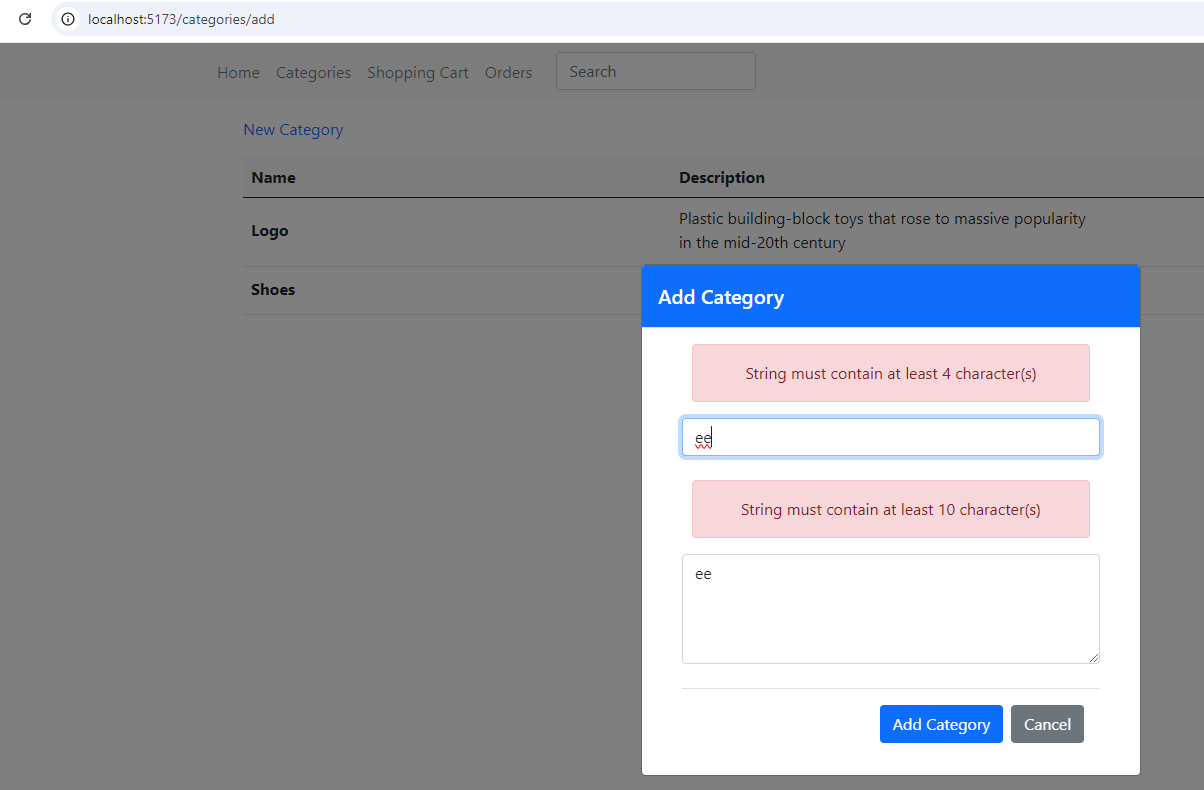
Figure 18
You will see that the form state is preserved.
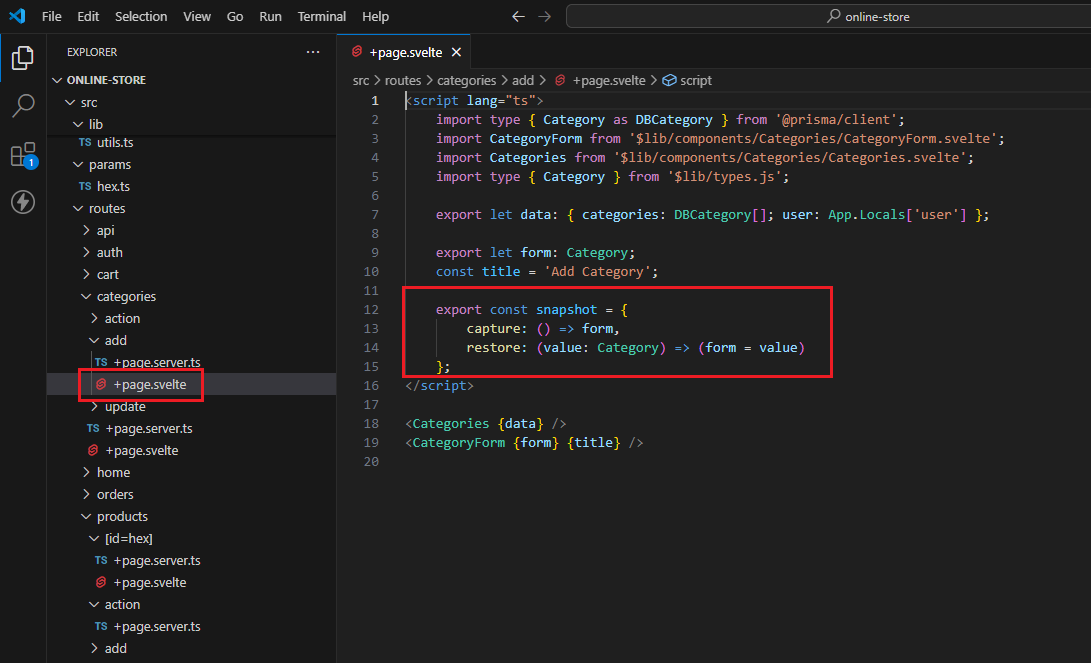
Figure 19
A nice SvelteKit feature is snapshots which saves and restores data when the user navigates on the site. This is perfect for saving the form state.
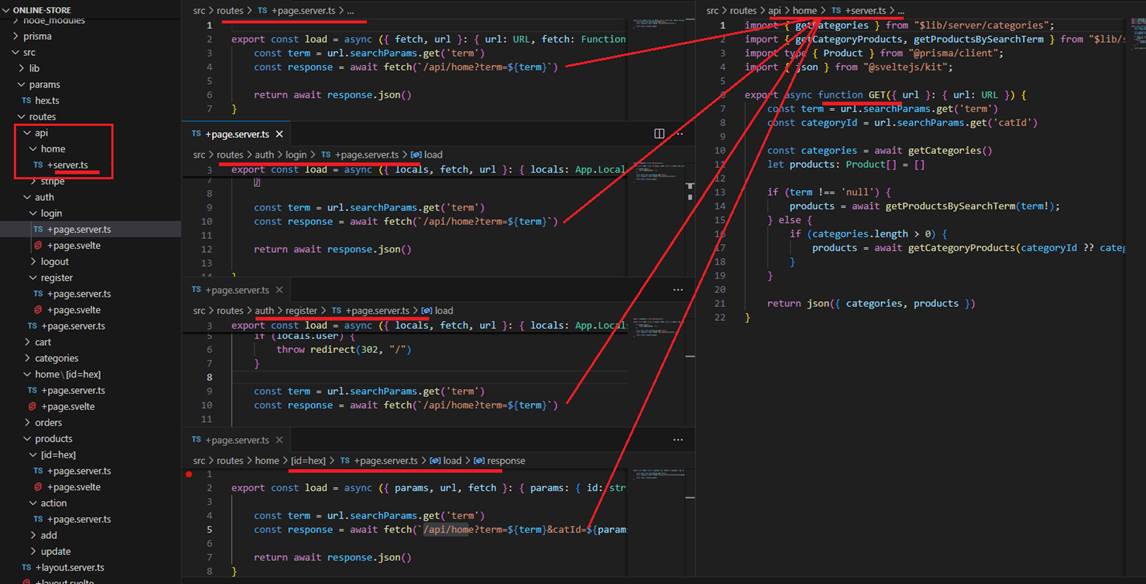
Figure 20
In SvelteKit, we can have Page and Standalone endpoints. In the project, we saw how we can retrieve data from the load function, which is a Page endpoint. A Standalone
endpoint can be used by multiple routes in your app and can even serve as a REST API inside or outside your app if you include CORS headers.
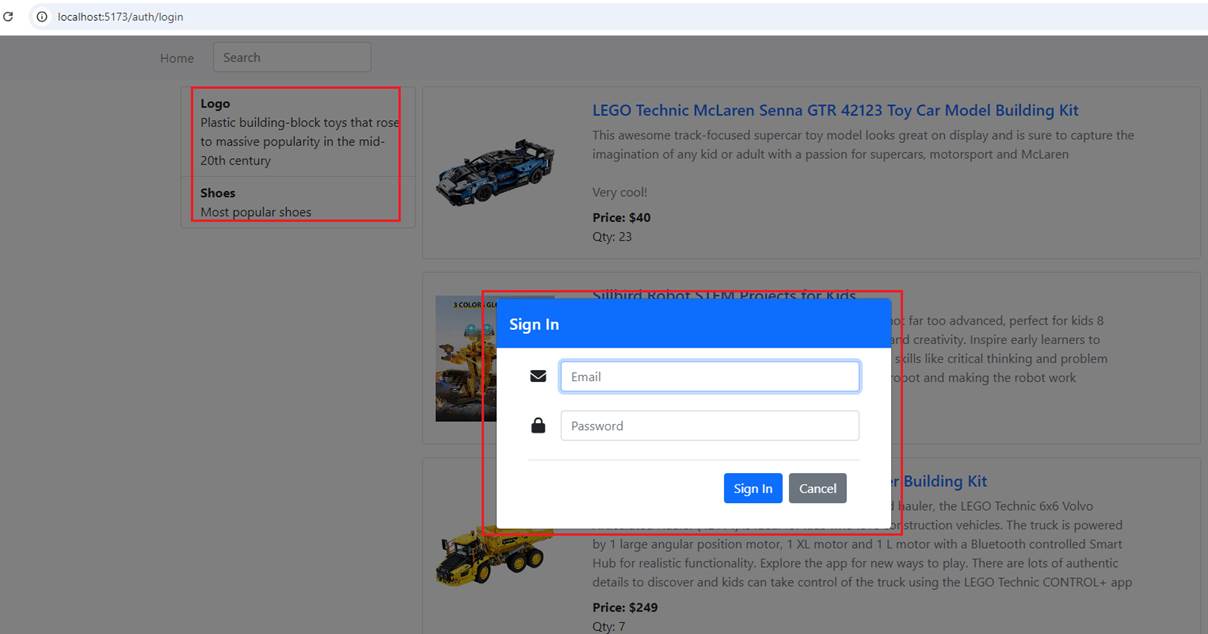
Figure 21
In our app, some routes should display the home page. For example, when we navigate through categories, login, or register, we should retrieve the home page
information, including categories on the left and products. To avoid duplicating code in multiple route load functions, we can obtain it from a Standalone endpoint.
The endpoint must be defined in a +server.ts file.
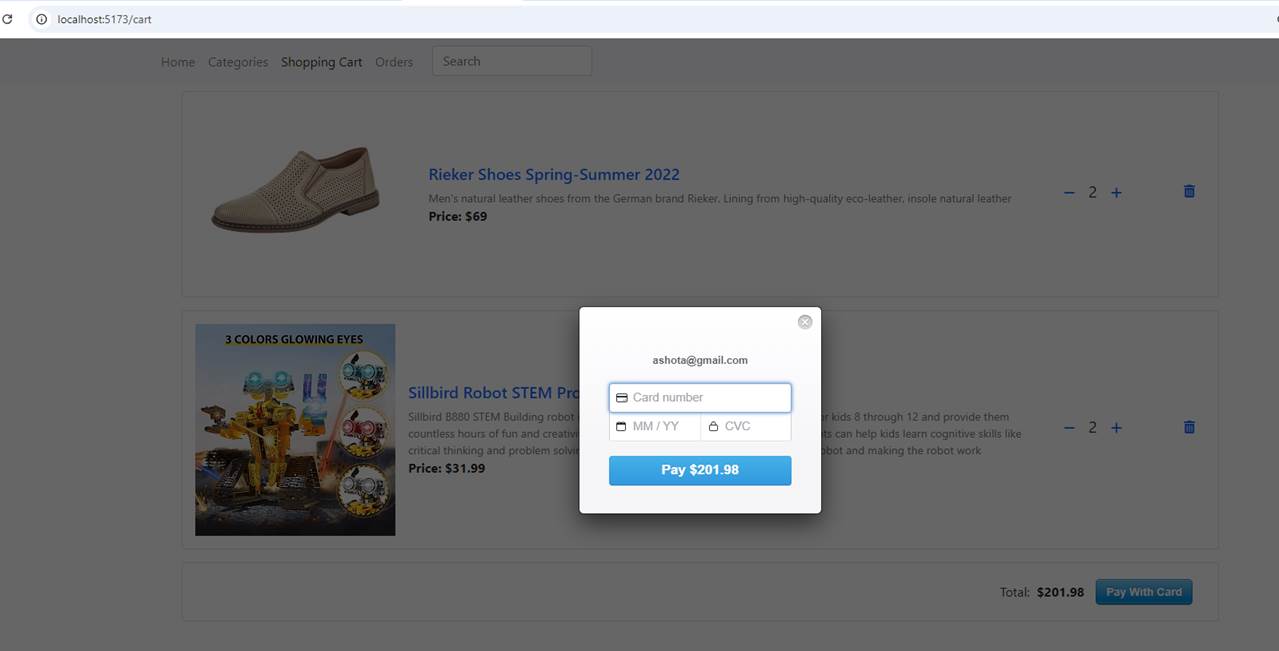
Figure 22
In the app, we use the react-stripe-checkout package for payments. For this reason, we integrate React into the project by installing the svelte-preprocess-react package.
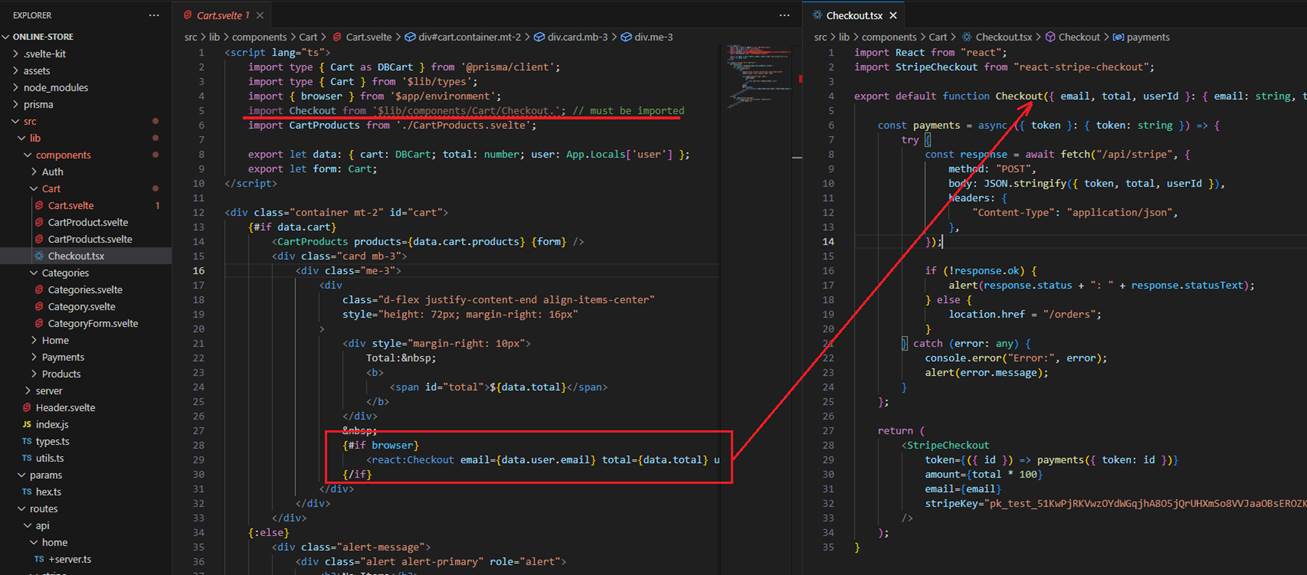
Figure 23
In the Cart.svelte file on the client side, we can display the React payment dialog and then call Checkout to process a payment.