Hierarchical Multi-Agent AI in LangGraph.js
Video Link: https://youtu.be/uoLzeRC3-_8
GitHub Repository: https://github.com/Ashot72/Langgraph.js-Hierarchical-Multi-Agent-AI
LangGraph.js is a library for building stateful, multi-actor applications with LLMs, used to create agent and multi-agent workflows. Compared to other
LLM frameworks, it offers these core benefits; cycles, controllability, and persistence.
In AI, hierarchical multi-agent systems refer to structured arrangements where multiple agents work together under a layered or tiered system.
The Supervisor (or Controller) oversees and coordinates the lower-level agents to ensure efficient task execution. In the app we can do this by
composing different subgraphs and creating a top-level supervisor agent, along with mid-level agents.
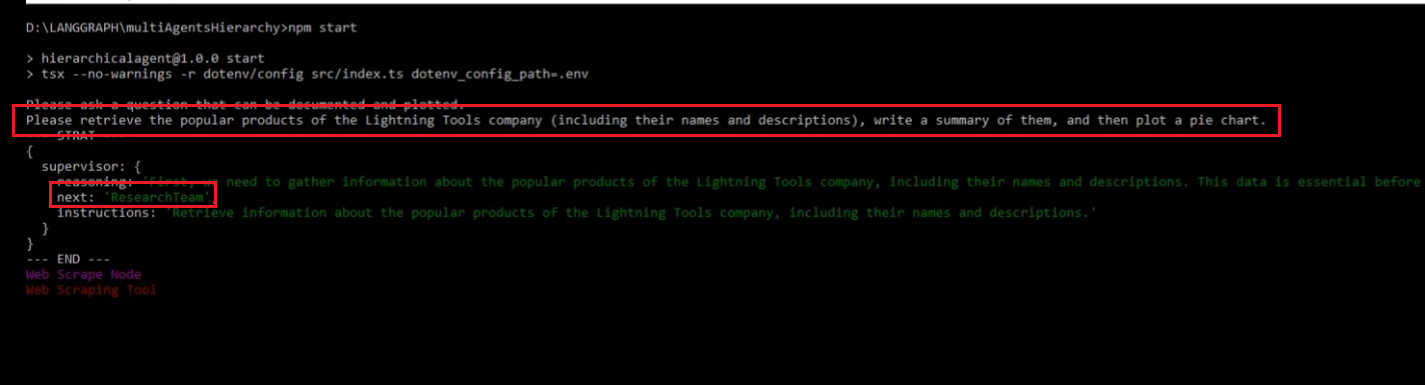
Figure 1
The supervisor routes the task to the respective agent by selecting the next role.
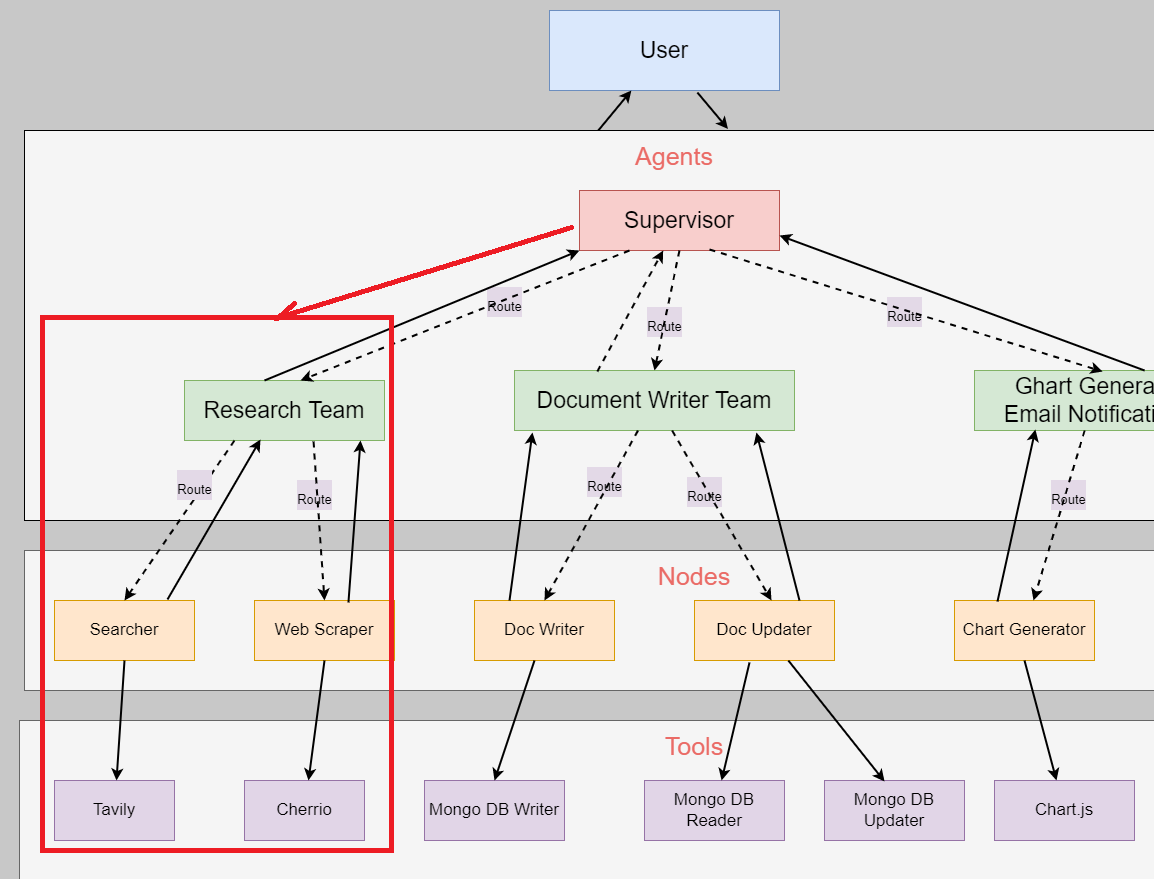
Figure 2
The user asks the question, and it is sent to the ResearchTeam to gather information, either by using TavilySearch or by scraping the web with Cheero. It can alternate between
these two tools several times before obtaining the information.
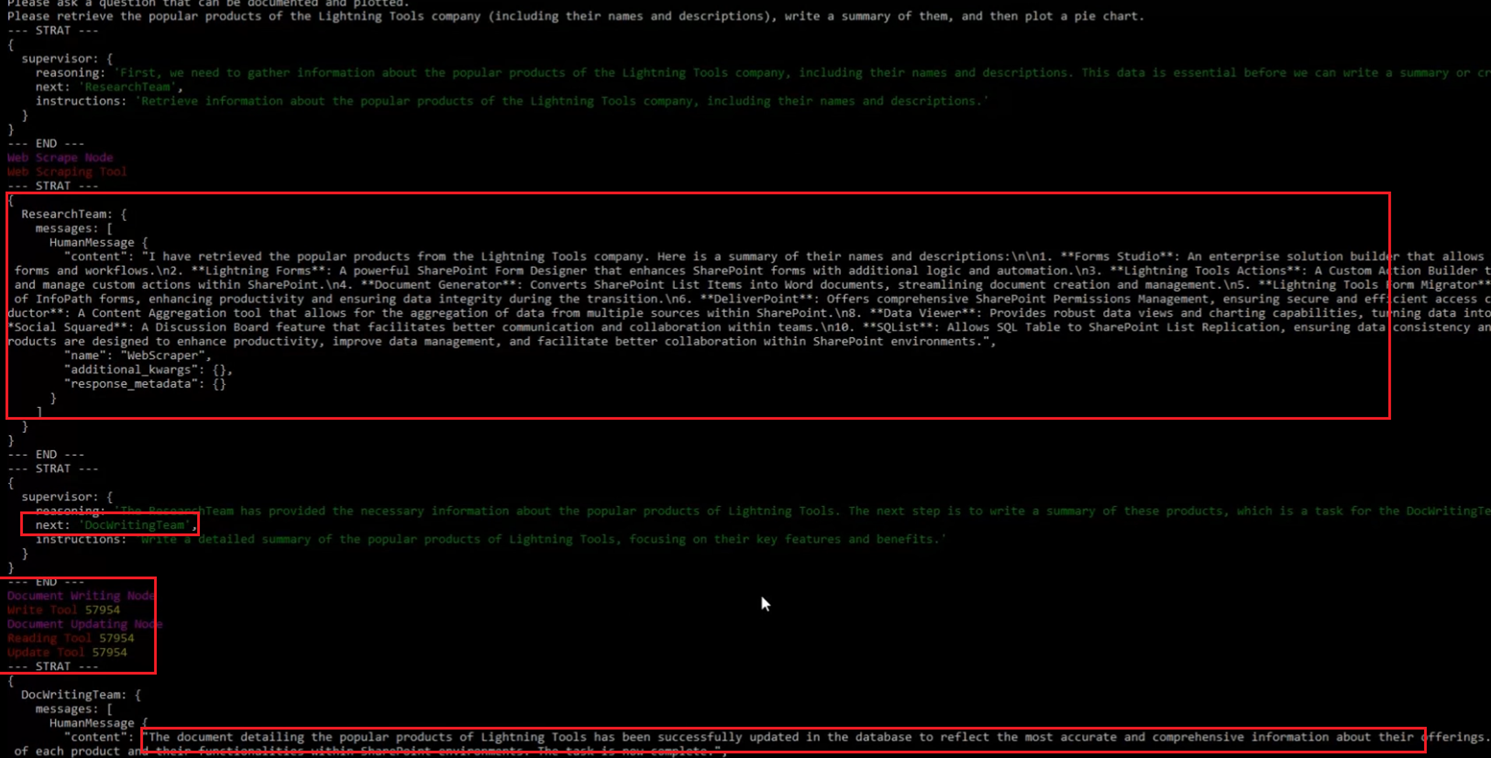
Figure 3
Once the information is obtained, it redirects to the document writing team to write the content. After writing, it can read and update the information. It follows this sequence: first, it calls
the Write tool, then the Reading tool, followed by the Update tool. This is not the pattern AI follows every time. It may simply write the information into the database without any updates afterward.
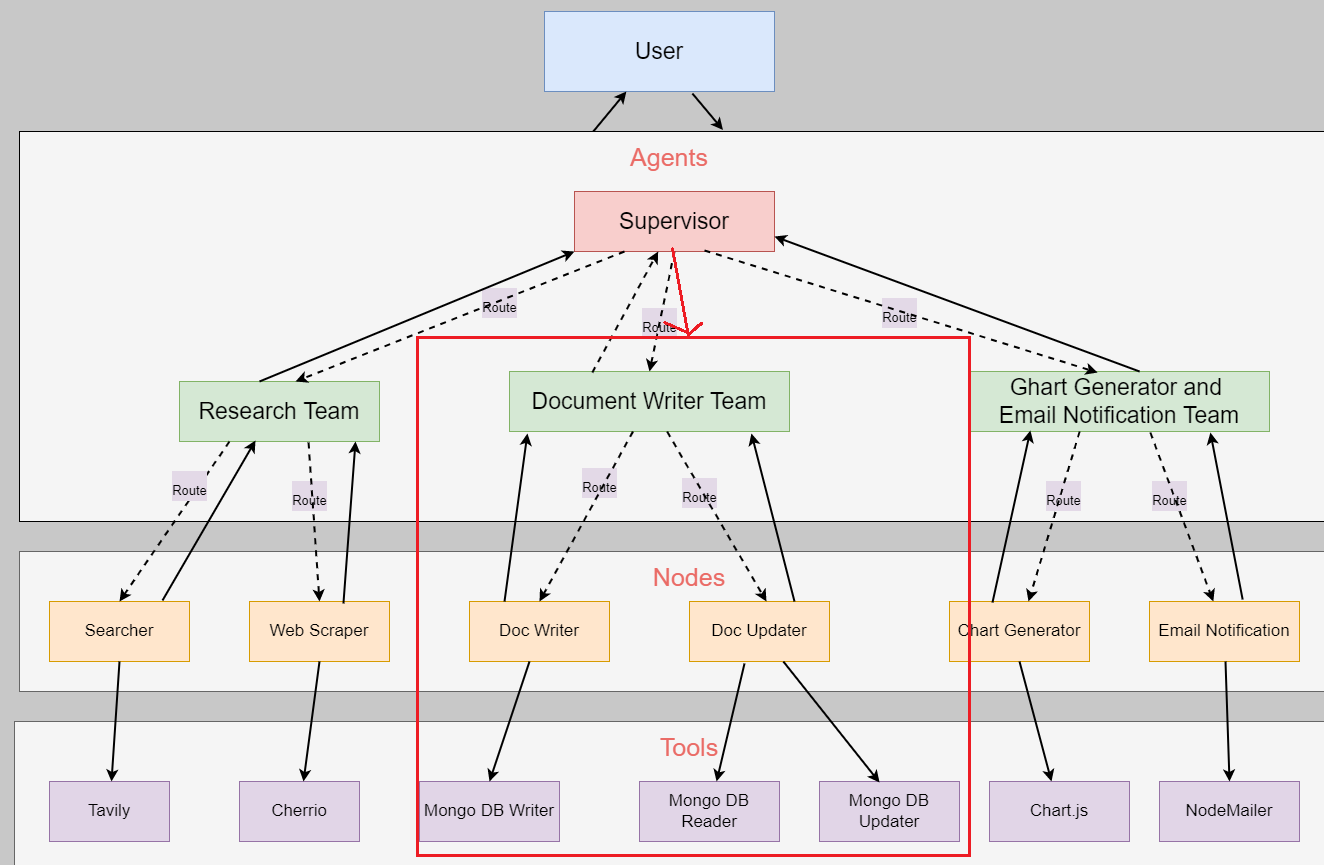
Figure 4
Here is Document Writing Team.
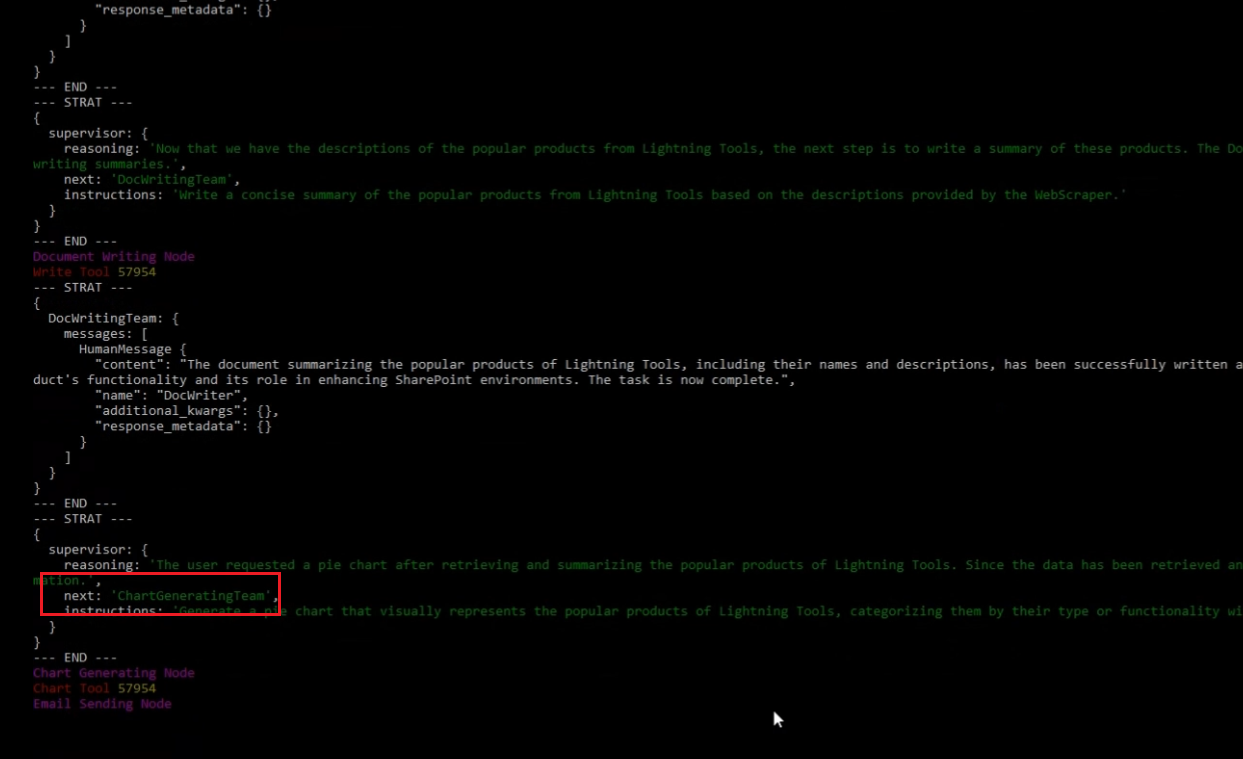
Figure 5
After writing it into the database, it redirects to the Chart Generator and Email Notification Team. Note, that the Supervisor may redirect from the Research Team to the
Document Writing Team, and then decide to return to the Research Team again and so on.
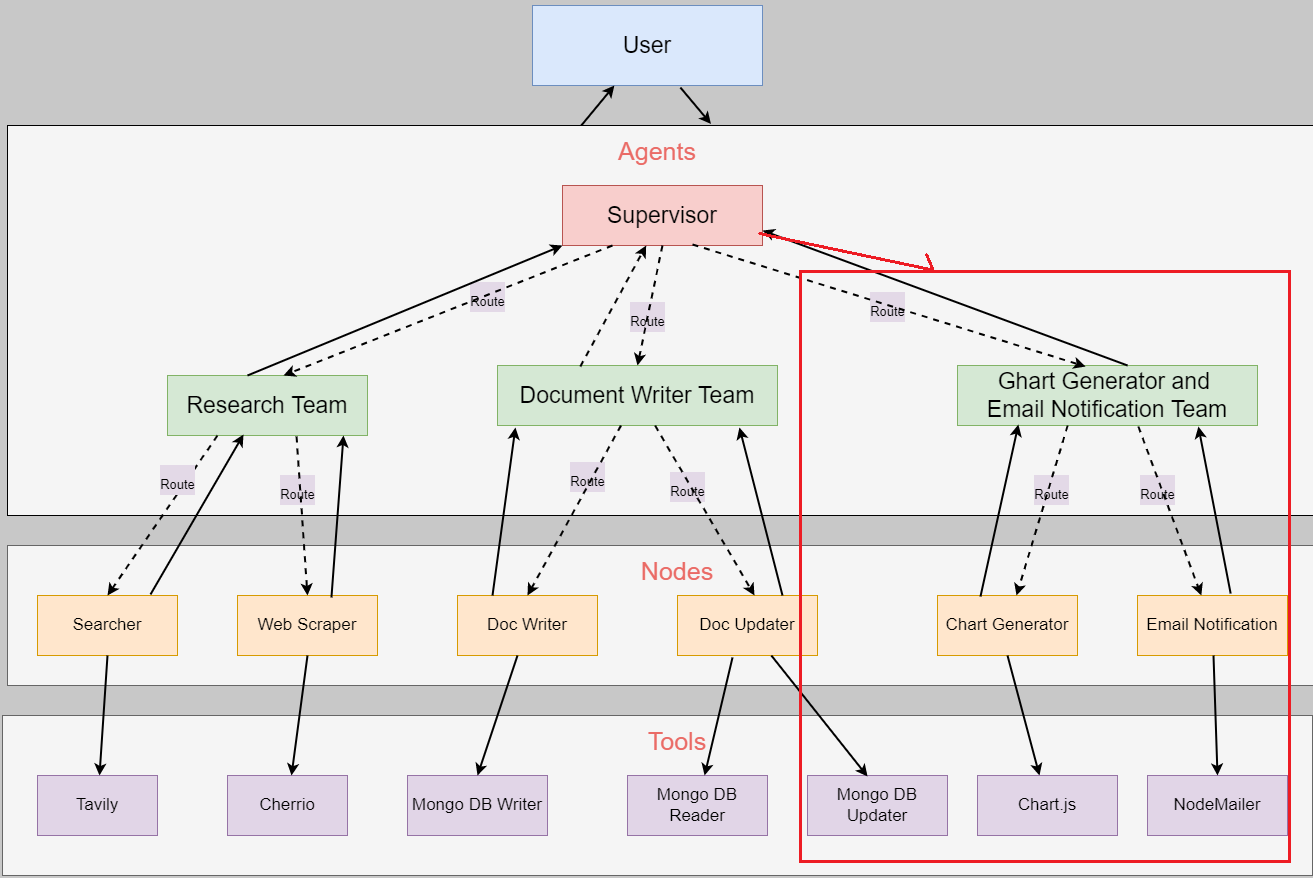
Figure 6
The Chart Generator and Email Notification Team.
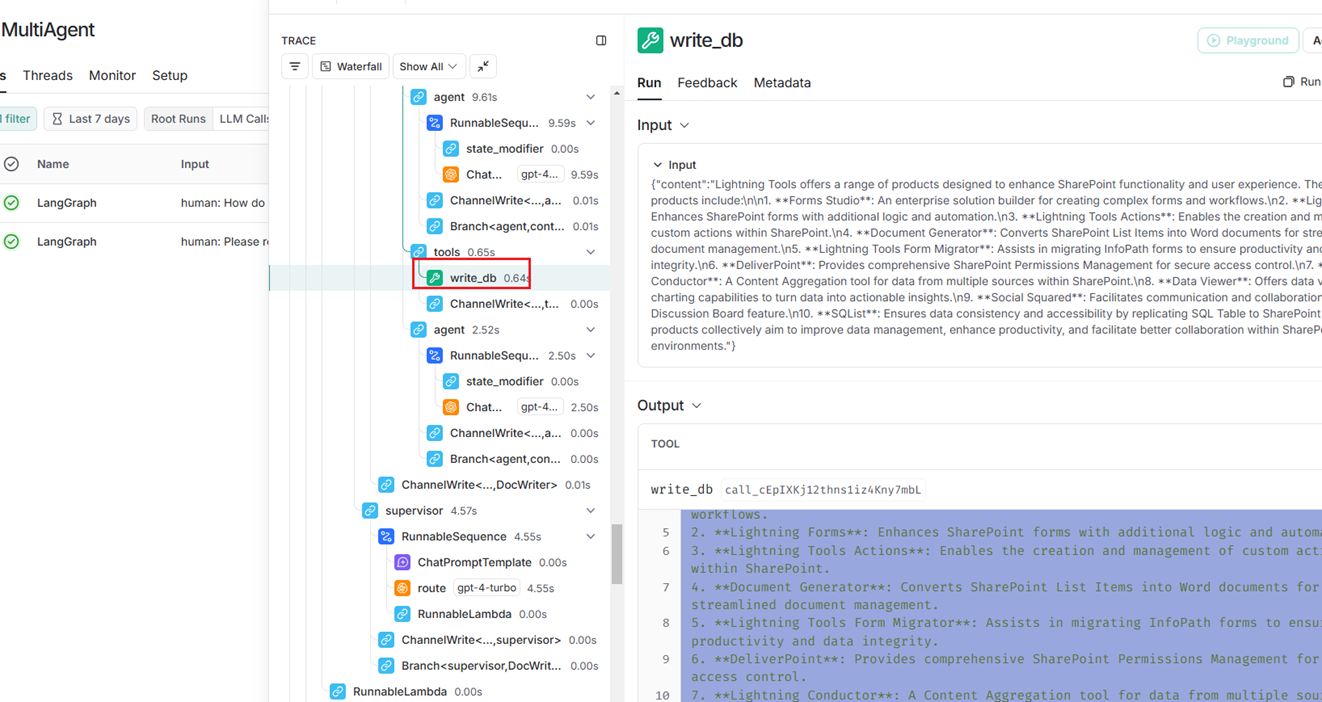
Figure 7
LangSmith is a platform designed to assist with the debugging, testing, and optimization of large language model (LLM) applications, particularly in production environments.
It provides tools to monitor model performance, trace execution flows, and evaluate LLM interactions, ensuring they operate efficiently and as expected.
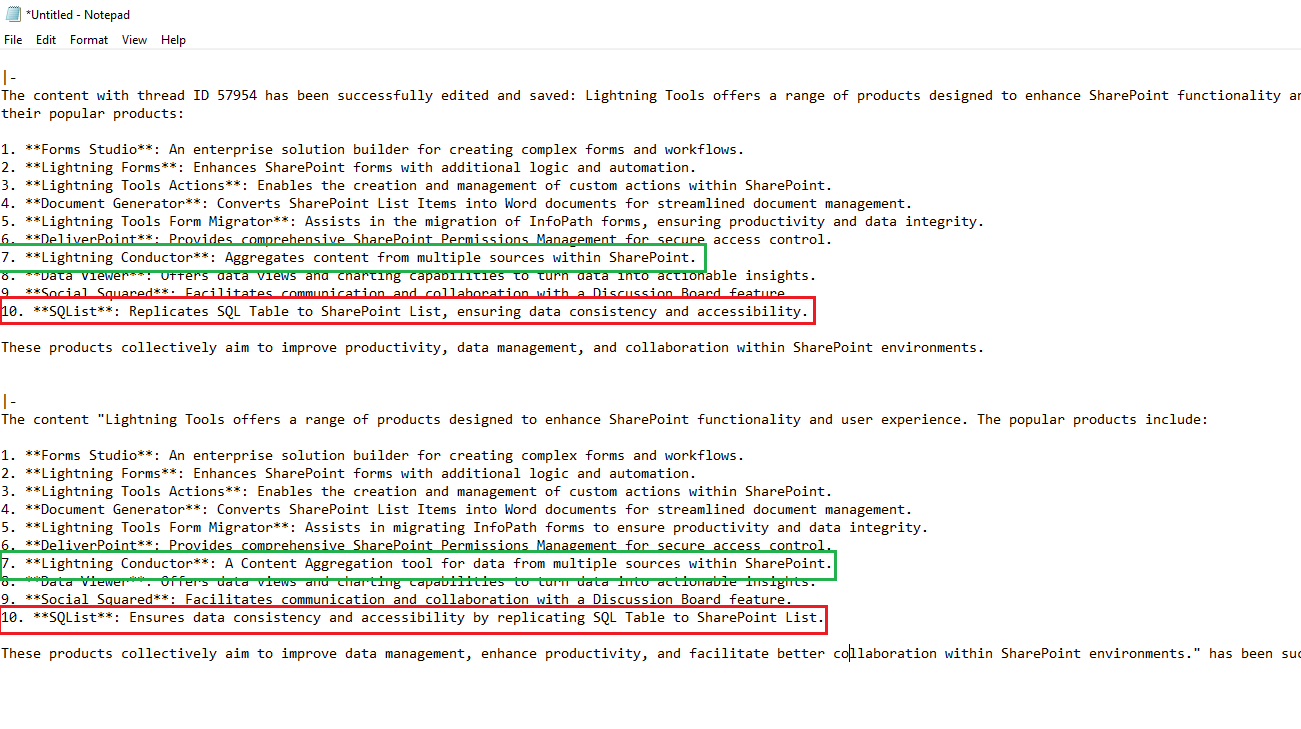
Figure 8
From the LangSmith window, I obtained the text before and after the update. The Supervisor decided to call the update tool, and the difference is minor in this case.
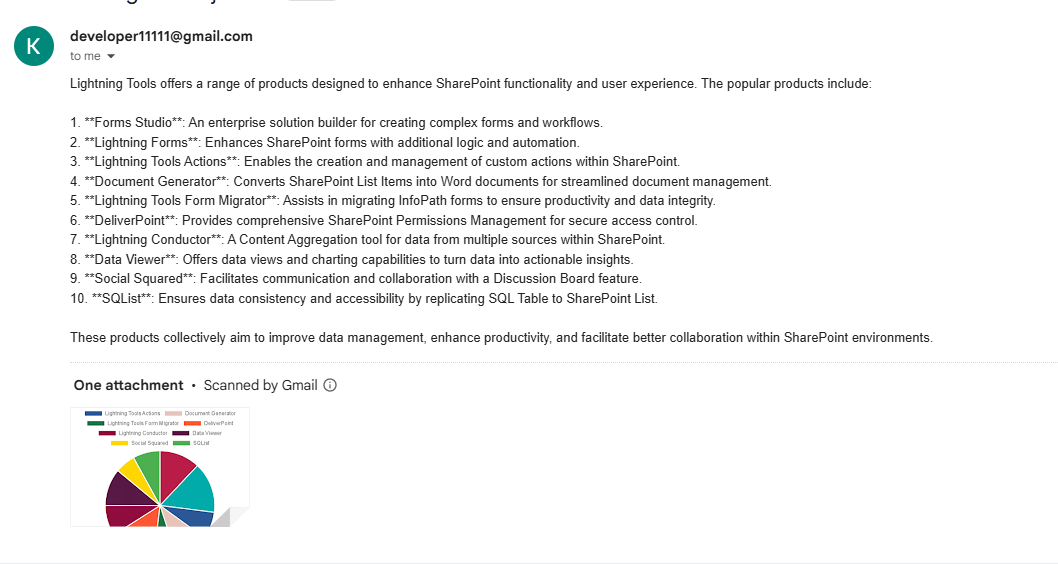
Figure 9
For the question, please retrieve the popular products of the Lightning Tools company (including their names and descriptions), write a summary of them, and then plot a pie chart, it found ten products.
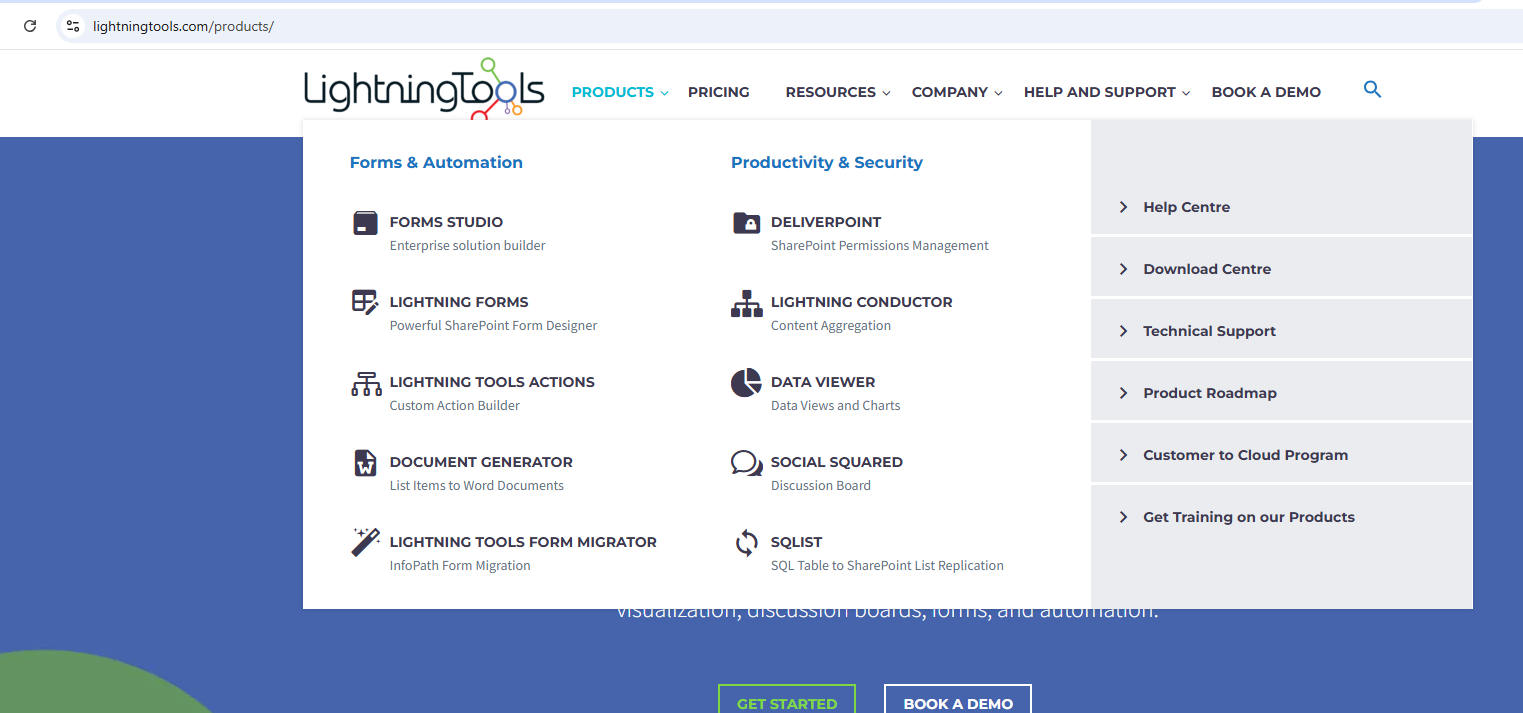
Figure 10
Actually, those ten products are found under the Products tab.
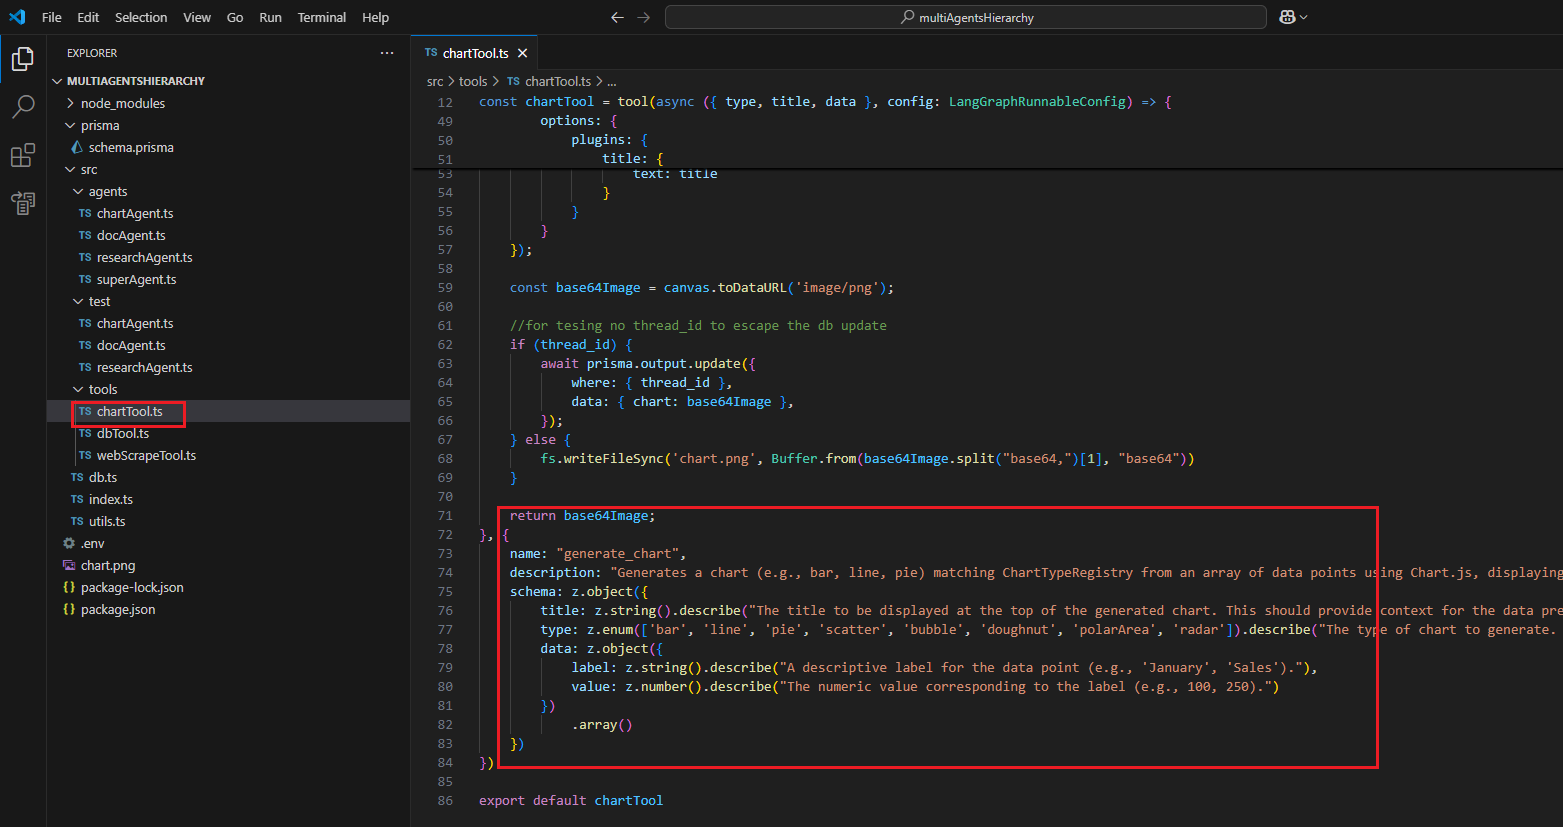
Figure 11
For the chart, we use the Chart.js library, and based on the prompt, it generates different charts such as line, bar, pie, etc.
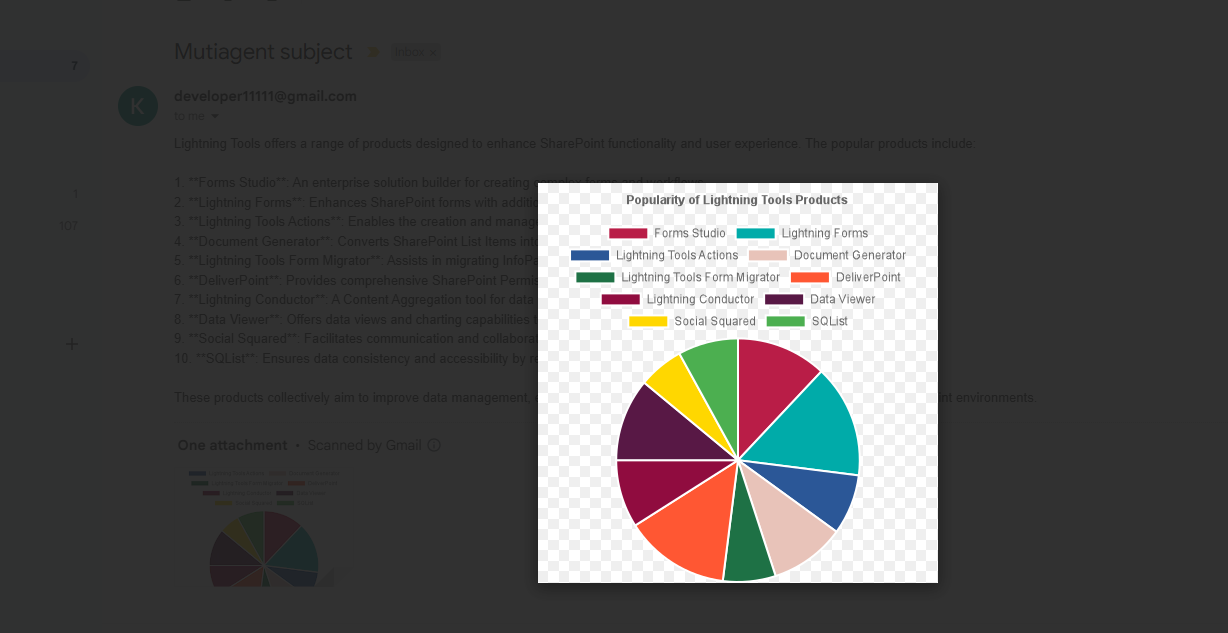
Figure 12
Here is the chart for the question above, emailed as an attachment.
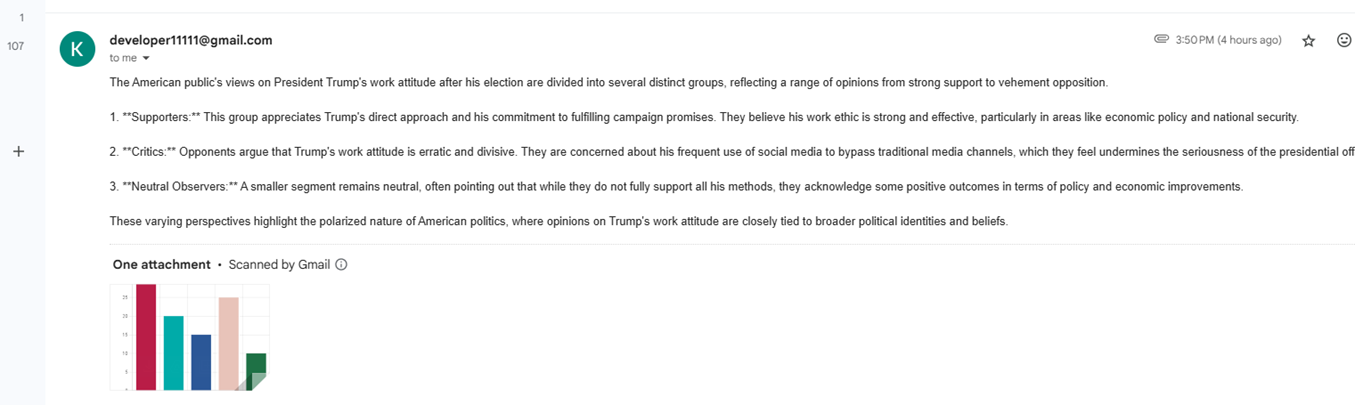
Figure 13
We asked the second question: How do the American people view Trump 's work attitude after his election? Please write a document that outlines the various
groups who support or oppose it, and then create a bar chart to visualize the data.
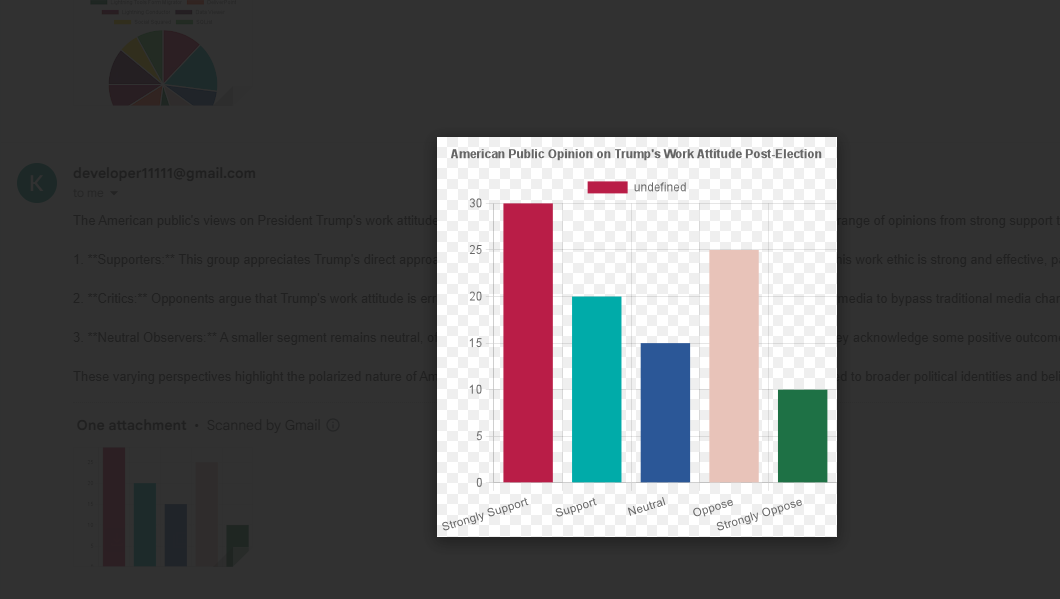
Figure 14
This is the bar chart generated.
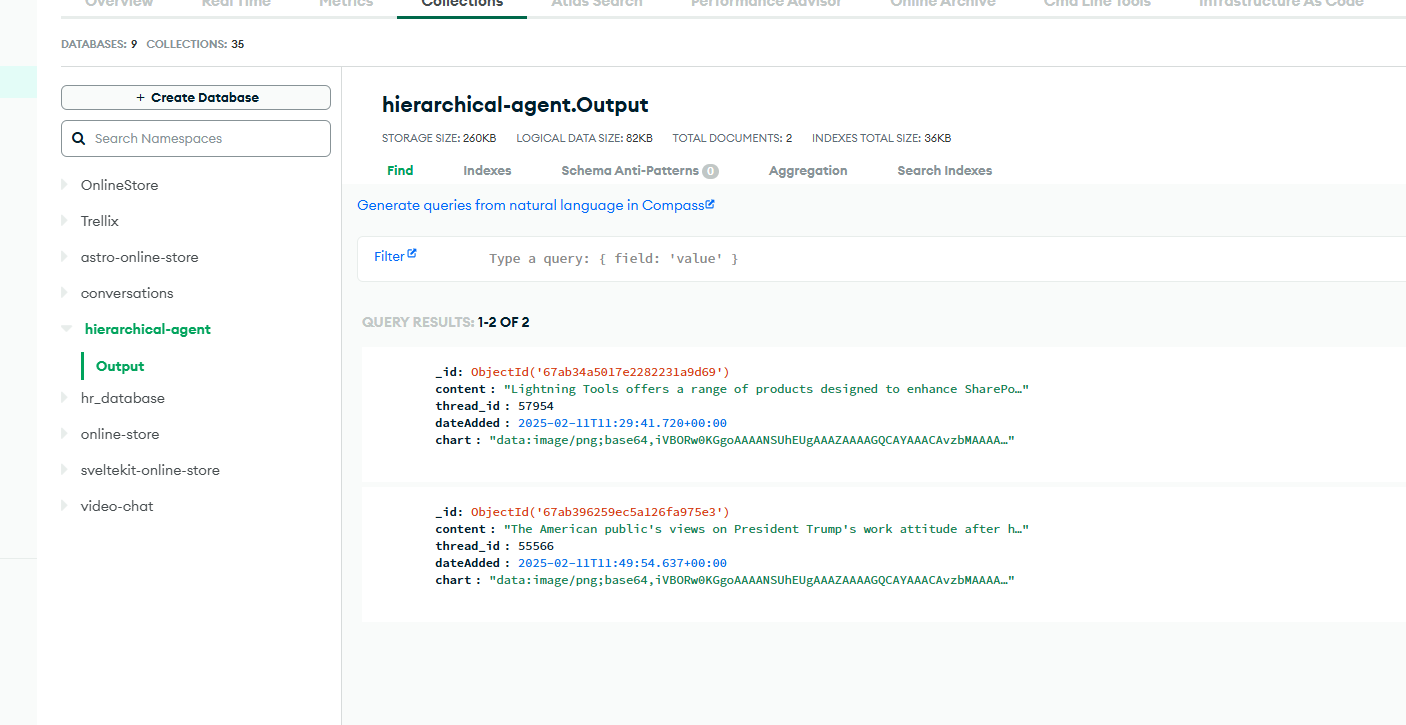
Figure 15
We save the response and the chart as base64 into the database. Based on the data, you can generate a web dashboard with the chart to analyze the response. We send the chart
as an email attachment by reading the content and base64 chart data, then converting it into an attachment.
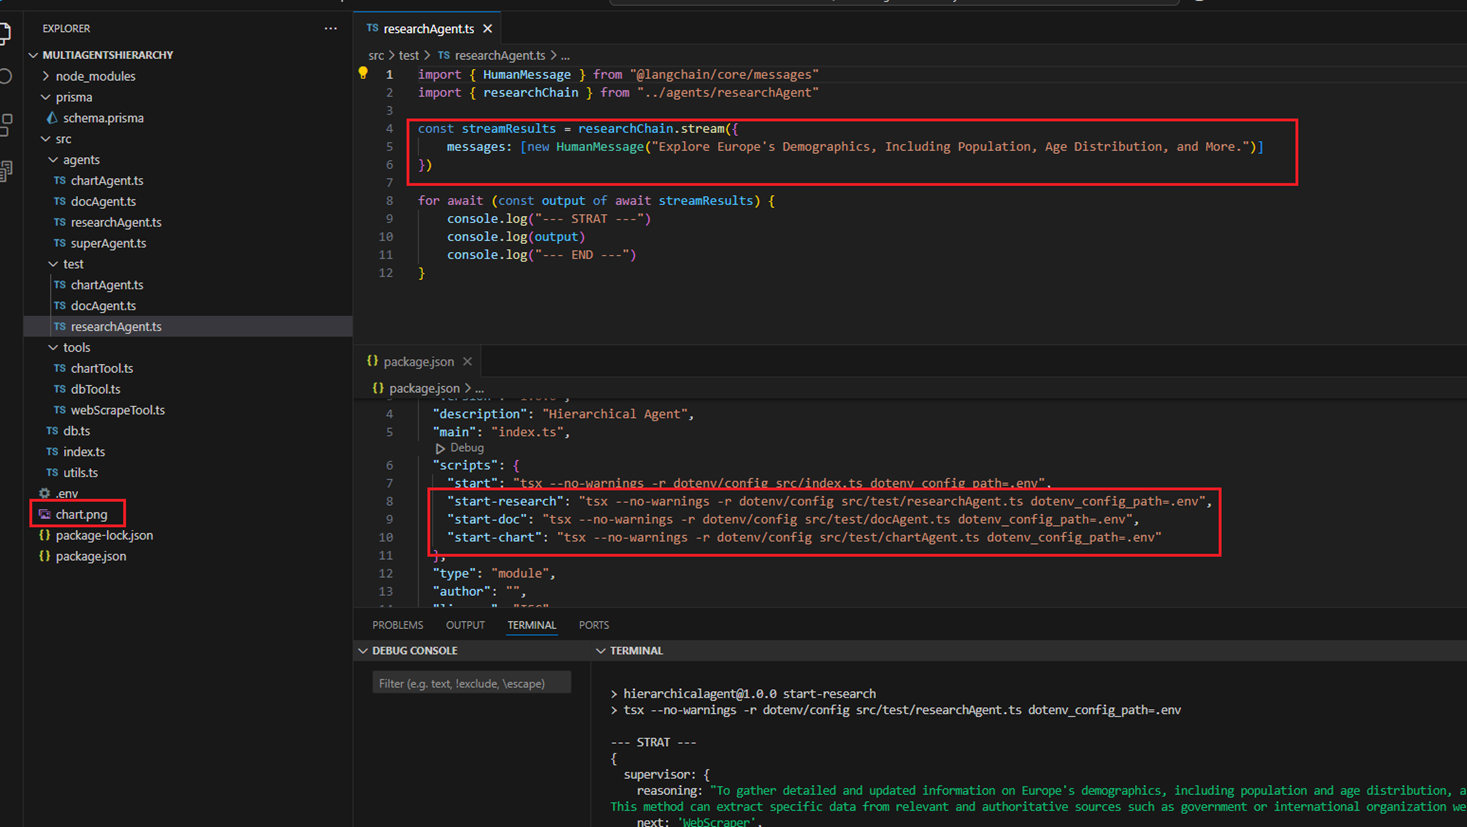
Figure 16
You can run each agent separately to understand it, and for the chart agent, it will generate a chart.png file.
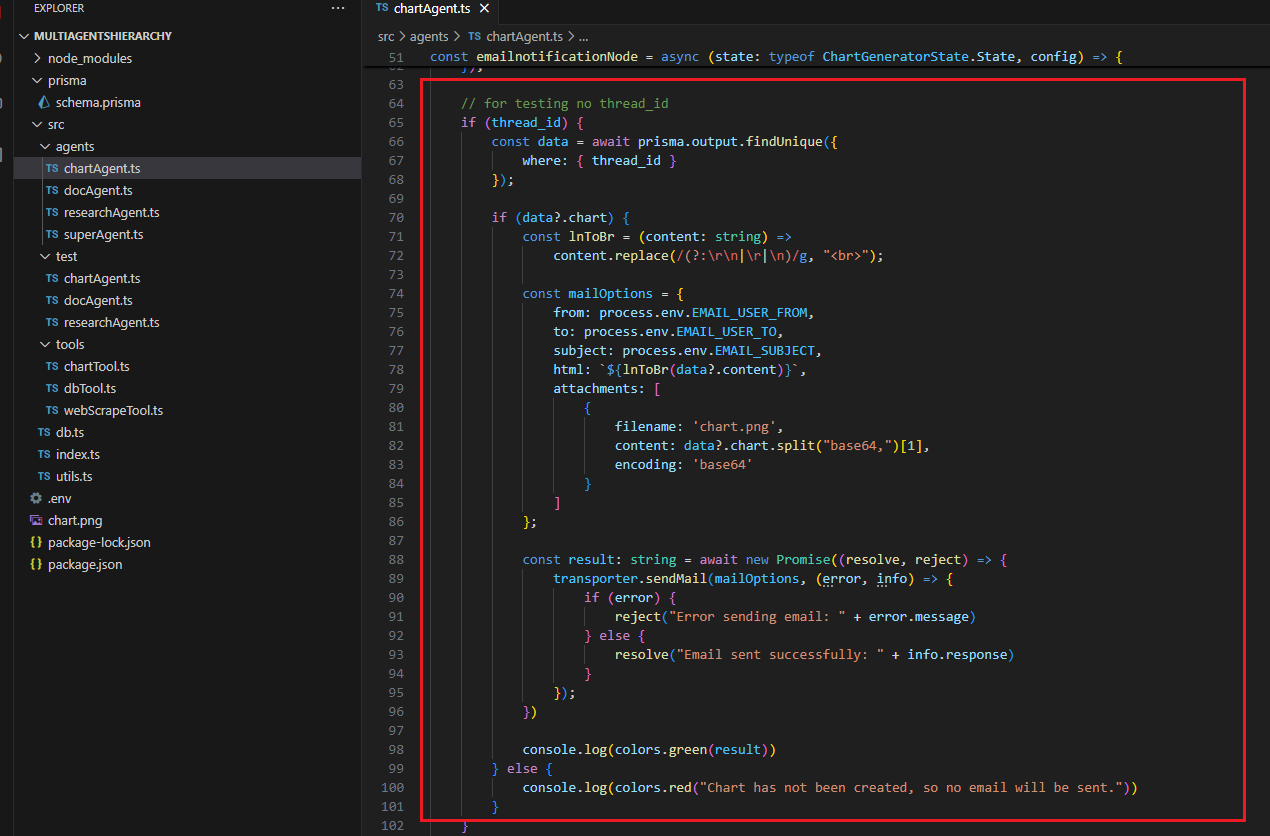
Figure 17
Sending emails is tricky when using the NodeMailer package. If you specify your Gmail username and password, it will not work. Google has changed its policy regarding this feature,
rendering it ineffective in resolving the problem. Thankfully, there is a solution that involves enabling 2-Step Verification and generating an app password.
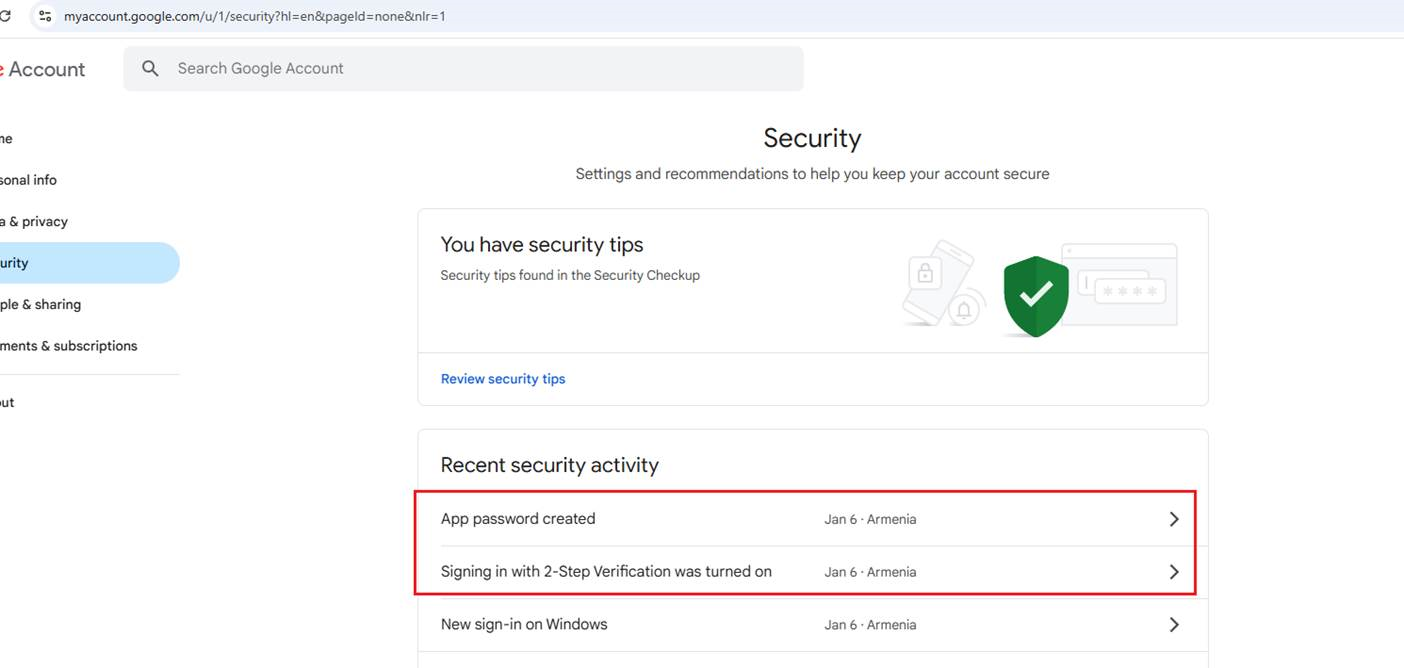
Figure 18
Navigate to https://myaccount.google.com/u/2/security?hl=en enable 2-Step Verification, and create an app password, which I have already done. Then, put the app password in the .env file.
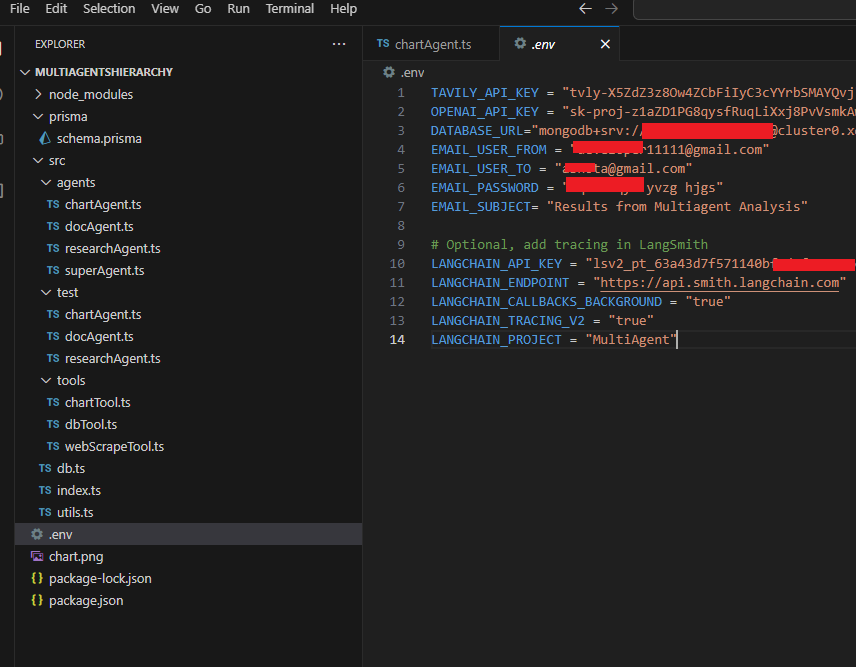
Figure 18
You must define the correct entries in the .env file, which should be created from env.example.txt file.